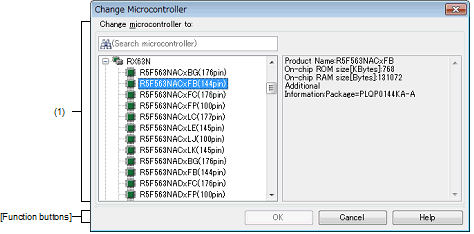
This dialog box is used to change the microcontroller to be used in the project (See “2.4.14 Change the microcontroller” for details).
The microcontroller can only be changed to another from the same family (RH850, RX, and RL78) that is compatible with the same build tools. |
After the microcontroller is changed, information for the pin configurator (design tool), code generator (design tool), and debug tool (except for registration of the Watch panel) is not maintained. |
The settings of the properties of the build tool are changed to those for the specified microcontroller. iodefine.h and the start-up source files of the specified microcontroller are copied as sample source files. For the start-up files, create a folder named "<device name after change>.nnn" (nnn = 000, 001, …) and copy them to that folder. The details of the changes are displayed in the Output panel. |
Although the [Section start address] property on the [Link Options] tabbed page is changed to the value for the specified microcontroller, the specification of addresses with #pragma address is not supported. If a section start address is changed, the size of the resulting section may extend beyond the capacity of the ROM or RAM. |

The following items are explained here.
On the Project Tree panel, select the microcontroller node, and then select [Change microcontroller...] from the context menu. |
Select a microcontroller to be used.
You can search a microcontroller selected in the list of microcontrollers simply.
The microcontrollers can be specified are listed and categorized by their nicknames.
The following information on the selected microcontroller that is used in the project is shown in the box at right.