Boot RZ/V2H Evaluation Board Kit
This page describes how to boot the RZV2H Evaluation Board Kit (RZV2H EVK).
Connection
This figure shows the connection to develop your AI application using AI Navigator.
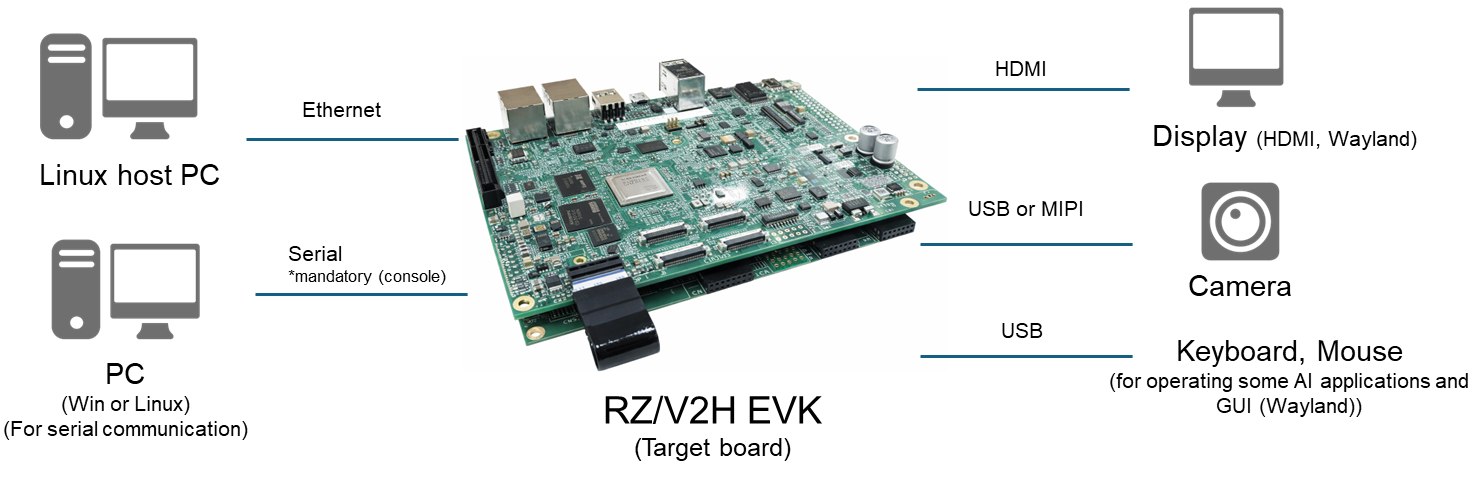
Target Board
Board Configuration (Hardware Setup)
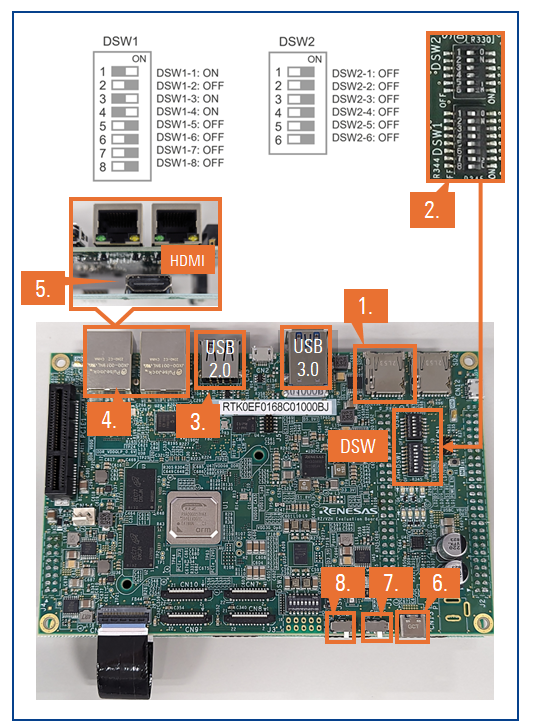
These figures show the board layout, including switches, slots, and connectors.
Boot Steps
-
Insert the microSD card to the Board.
Note Use the microSD card slot CN3 on the Board as shown in the figure.
- Change SW1 and SW11 settings as shown in the figure to boot the board from the microSD card..
- Connect an Ethernet cable between the board and Linux PC.
- Connect the HDMI monitor to the Board.
- Connect an Ethernet cable between the Board and Linux Host PC.
- Connect the power cable to the Board.
- Turn the SW3 ON.
- Turn the SW2 ON to power on the Board.
- After boot-up, the following screen will be displayed on the HDMI monitor.
- Open either the console on the GUI or a terminal on your PC that is connected to the target.
- To communicate between the Linux host PC and the target board via Ethernet, configure the IP addresses on both sides so that they are on the same network.
-
Linux Host PC:
Configure the Ethernet interface on the host PC and assign an appropriate IP address (for example, 192.168.1.10). -
Target board:
Configure the Ethernet interface on the target board and assign an IP address in the same subnet (for example, 192.168.1.11).
Note When using AI Navigator, the target board IP address is set to 192.168.1.11 by default. -
Linux Host PC:
- Right-click the target e² studio project and select "Debug As" > "Debug Configurations...".
- In the debug configuration window, select the target project under "Target Communication Framework" and confirm that the connection to the target board is correctly registered.