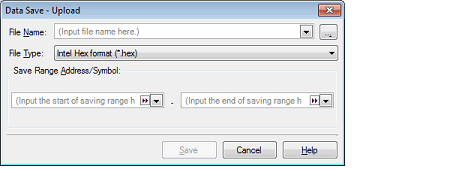
The memory content of the currently connected debug tool can be saved (uploaded) to any file.
To do an upload, use the Data Save dialog box that is opened by choosing [Upload...] from the [Debug] menu.
Follow the procedure described below to make the necessary setting in this dialog box.

Specify a file name in which you save.
Enter directly in the text box (specifiable in up to 259 characters), or select an input history item from the drop-down list (up to 10 history entries).
Also, you can select a file from the Select Data Save File dialog box that is opened by clicking the [...] button.
Select the type of file in which you want to save from the drop-down list below.
The selectable file types are as follows:
In the Intel hex format, memory contents are always saved in "extension linear address code (32-bit address)." |
Specify the "start address" and "end address" to set a range of memory to be saved in a file.
Enter hexadecimal values or address expressions directly in the respective text boxes or select an input history item from the drop-down list (up to 10 history entries).
By holding down [Ctrl]+[Space] keys in this text box, you can complete the symbol name at the present caret position (see "2.20.2 Symbol name completion function"). |
Memory contents are saved in specified form to a specified file as upload data.