The optimizing linker (rlink) used by CC-RX can allocate multiple sections defined in a program to the same address. The sections allocated in this way are called "overlaid sections".
The debug tool provides a function to select the debug target section from the overlaid sections (priority sections) allocated to the same address. The function is called "overlaid section selection function".
A load module using overlaid sections can be debugged with switching of the priority section before program execution.
The method for generating a load module to use the overlaid section selection function is shown below.
Copy the ROM area contents to the RAM area to expand the code and data in the RAM.
Set the ROM-to-RAM mapped sections and overlaid sections to use the overlaid section selection function.
Select the build tool node on the project tree and select the [Link Options] tab on the Property panel.
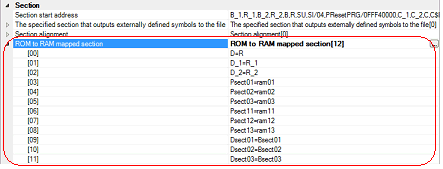
Setting the ROM-to-RAM mapped sections is made with the [ROM to RAM mapped section] property in the [Section] category.
This reserves the RAM section with the same size as that of the ROM section and relocates the symbols defined in the ROM section to addresses in the RAM section.

If you click the [...] button, the Text Edit dialog box will open.
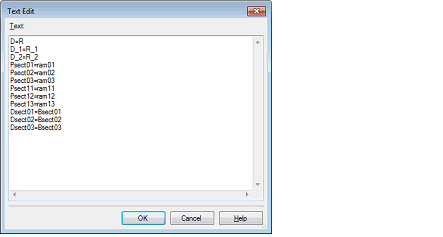
Enter the section name in [Text] in the format of "ROM section name=RAM section name", with one section name per line.
You can specify up to 32767 characters per line, up to 65535 lines.
If you click the [OK] button, the entered section names are displayed as subproperties.
To change the section names, you can use the [...] button or enter them directly in the text box of the subproperty.
Setting the sections is made with the [Section start address] property in the [Section] category.

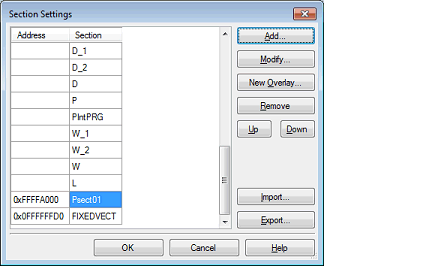
If you click the [...] button, the Section Settings dialog box will open.

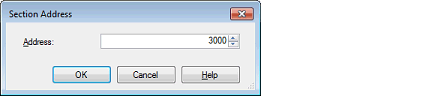
If you click the [Add...] button, the Section Address dialog box will open.
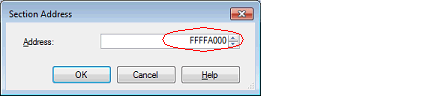
Enter in [Address] the address of the ROM section to be added and click the [OK] button to add the entered address to [Address] in the Section Settings dialog box.
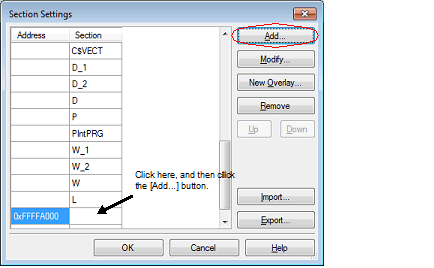
Click the Section column on the added address row and click the [Add...] button to open the Add Section dialog box.

Enter in [Section name] the name of the ROM section to be added and click the [OK] button to add the entered section to [Section] in the Section Settings dialog box.
For other ROM sections, set addresses and section names in the same way.
Click the Address column and click the [Add...] button to open the Section Address dialog box, allowing you to add a new address. |
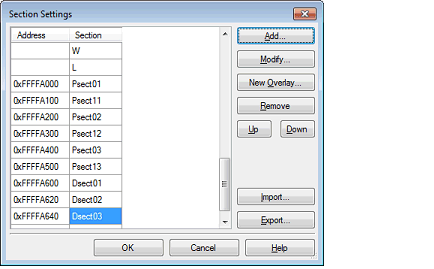
Click an added address and click the [Add...] button to open the Section Address dialog box.
Enter in [Address] the address of the RAM section to be added and click the [OK] button to add the entered address to [Address] in the Section Settings dialog box.

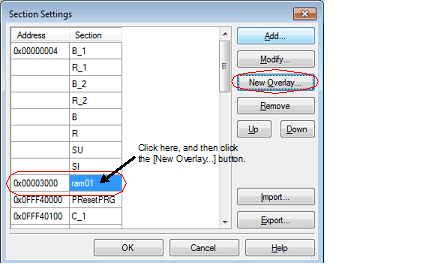
Click the added address row (Address column or Section column) and click the [New Overlay...] button to open the Add Overlay dialog box.
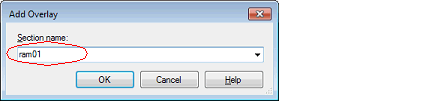
Enter in [Section name] the name of the RAM section to be added and click the [OK] button to add the entered section to [Section] in the Section Settings dialog box.
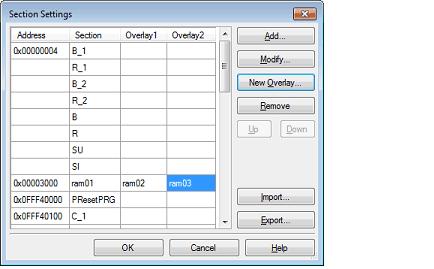
Add the sections to be allocated to the same address by using the [New Overlay...] button in the same way.
The added sections are displayed under [Overlay n] (n: number starting with "1").
For other RAM sections, set addresses and section names in the same way.
Click the Address column and click the [Add...] button to open the Section Address dialog box, allowing you to add a new address. |
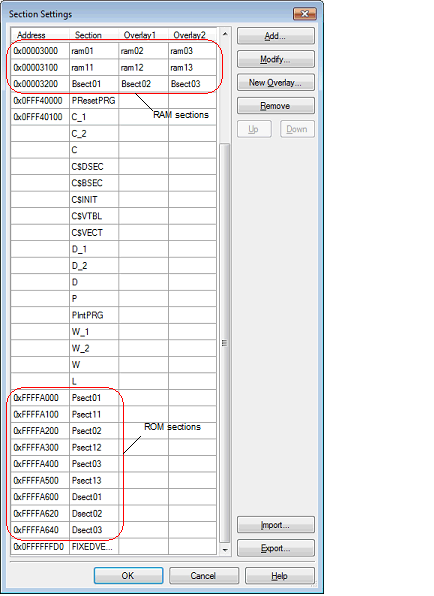
Click the [OK] button. The specified ROM sections and RAM sections (overlaid sections) will be displayed in the text boxes.

A load module file to use the overlaid section selection function is generated.