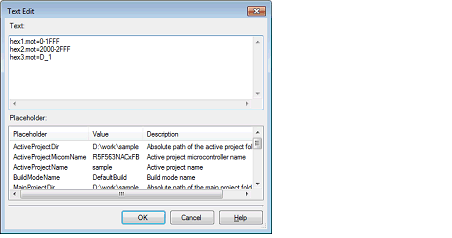
You need to set the hex file output range to fill the vacant area. The property to fill the vacant area is displayed after setting the hex file output range.
The procedure for the setting is shown below.
Select the build tool node on the project tree and select the [Hex Output Options] tab on the Property panel.
The setting of the hex file output range is made with the [Division output file] property in the [Output File] category.

If you click the [...] button, the Text Edit dialog box will open.

Specify the division output file name in [Text] in the format of "file name=start address-end address" (start address, end address: The start address and end address of the output range) or "file name=section name" (section name: The name of the output section), with one file name per line.
If multiple section names are specified, delimit them with a colon as in "file name=section name:section name".
Specify the start address and end address in hexadecimal.
You can specify up to 259 characters per line, up to 65535 lines.
If you click the [OK] button, the entered division output file names are displayed as subproperties.

To change the division output file names, you can use the [...] button or enter them directly in the text box of the subproperty.
Set the method for filling the vacant area in the output range.
Select [Yes(Random)(-SPace=Random)] in the [Fill unused areas in the output ranges with the value] property in the [Hex Format] category.

Select [Yes(Specification value)(-SPace=<Numerical value>)] in the [Fill unused areas in the output ranges with the value] property in the [Hex Format] category. The [Output padding data] property will be displayed.
[Fill unused areas in the output ranges with the value] and [Output padding data] Property |

Enter the fill value for the vacant area directly in the text box.
The range that can be specified for the value is 0 to FFFFFFFF (hexadecimal number).