A project for multi-core consists of a boot loader project and an application project. The application project creates programs for each CPU core, and the boot loader project manages activation of those programs.
The following shows how to create a project for multi-core by specifying the boot loader project and the application project as the main and subprojects, respectively.
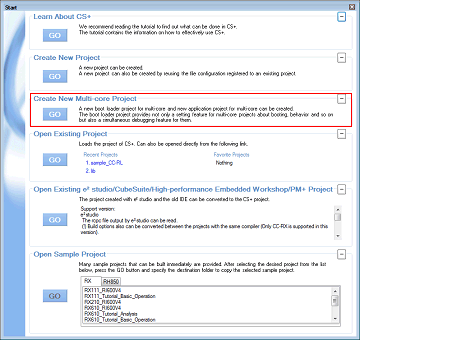
On the tool bar, click  to open the Start panel.

Click the [GO] button in the [Create New Multi-core Project] area to open the Create Project dialog box.

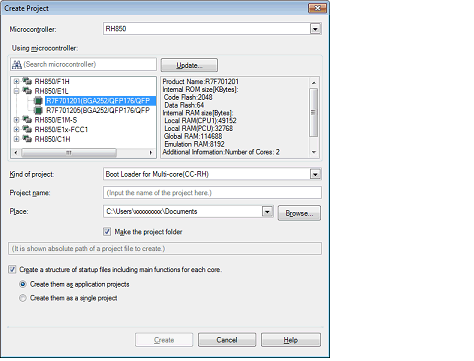
Set the items in the order below.
[RH850] is selected on [Microcontroller].
Select the microcontroller to use in the project on the [Using microcontroller] area.
If your microcontroller is not in the [Using microcontroller] area, click the [Update...] button.
You can open the CS+ Update Manager window, and check for microcontroller information updates via the network.
The [Update...] button is only enabled when this product is installed using the installer. It is disabled when a packaged item is being used. |
[Boot Loader for Multi-core(CC-RH)] is selected on [Kind of project].
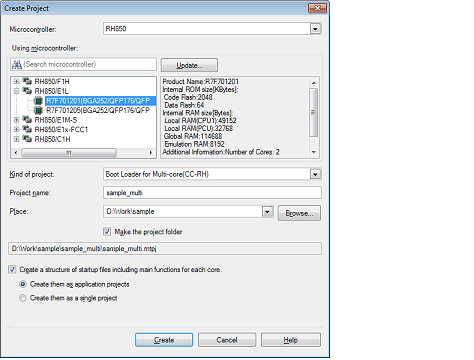
Specify the name of the project and the location to create the project file in [Project name] and [Place].
If you don’t create a folder with the project name under the specified location, clear the [Make the project folder] check box.
When directly entering the location to create the project file, enter it as an absolute path. |
When simultaneously creating a structure of startup files for each core, select the [Create a structure of startup files including main functions for each core.] check box.
When the [Create a structure of startup files including main functions for each core.] check box has been selected, select either of the following:
Case where a structure of startup files for each core is created as an application project for the number of cores |
Select [Create them as application projects].
Select [Create them as a single project].
An image of the dialog box after setting the items is shown below.

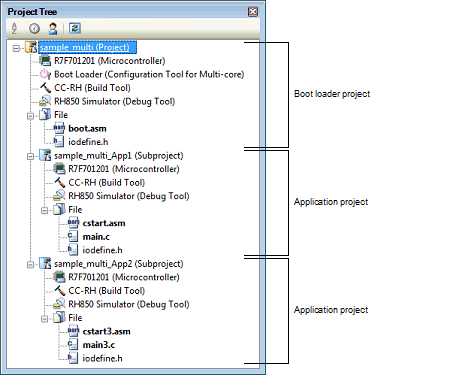
When you click the [Create] button, the project file is created in the location specified in (4) and the structure of the created project is displayed as a tree in the Project Tree panel.

The start-up source files for each project are also created in the project folder and registered in the project tree.
When [Create a structure of startup files including main functions for each core.] check box is not selected |
|
For defining the processing from the occurrence of a reset to a branch to each application project and defining the interrupt vector table |
|
When [Create a structure of startup files including main functions for each core.] check box and [Create them as application projects] radio button are selected |
|
For defining the processing from the occurrence of a reset to a branch to each application project and defining the interrupt vector table |
|
When [Create a structure of startup files including main functions for each core.] check box and [Create them as a single project] radio button are selected |
|
For defining the processing from the occurrence of a reset to a branch to each application project and defining the interrupt vector table |
|
Add further application projects as subprojects. |
 to resize the area.