Add C source files to be used for creation of the download file to the debug-dedicated project.
By adding the C source file to the project, you can perform source level debugging (step execution in source level units, etc.).
You can also add files other than C source files as necessary.
To perform source level debugging, a load module file with the symbol information must be added as a download file to debug (see "E.3.1 Add a download file"). |
When a load module file has been added in the [Download File Settings] tab on the Property panel of the debug tool, source files are not added to the project tree. |
Whether or not to automatically add source files to the project tree is determined by a setting in the [General - Build] category in the Option dialog box. |
When you add load module files to the Download file node of the project tree, and download to the debug tool, based on source file information obtained from the download file, source files are automatically added to the project tree. |
When there are files which cannot be added by the above method, use the following methods to add them.
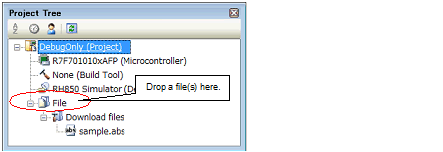
Drag a file(s) from Explorer or the like, and drop it onto the File node on the project tree.
Drag a folder(s) from Explorer or the like, and drop it onto the File node on the project tree. The Add Folder and File dialog box will open.
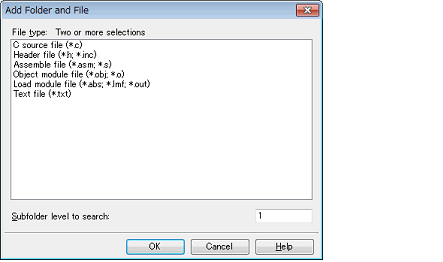
In the dialog box, select the types of the files to be added and specify the number of levels of the subfolder to be added to the debug-dedicated project. At this time, you can select multiple file types by left clicking while holding down the [Ctrl] or [Shift] key. If nothing is selected, it is assumed that all types are selected.
And then click the [OK] button.
Select the File node on the project tree, and then select [Add] >> [Add New File...] from the context menu. The Add File dialog box will open.
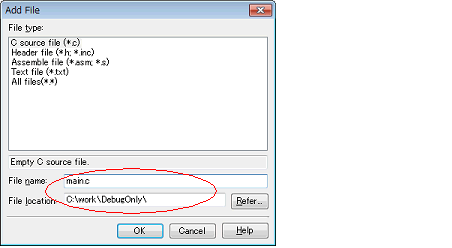
In the dialog box, specify the file name to be created newly and the location in which it is created, and then click the [OK] button.
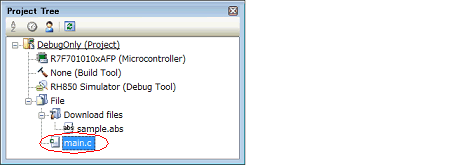
The project tree after adding the file and folder will look like the one below.
Note that the location of the file added below the File node depends on the current settings of [Toolbar] in the Project Tree panel.

By double-clicking the added file name on the project tree, you can open the Editor panel and edit the contents of the file directly.
By dragging a file and dropping it onto the Editor panel, you can open the file in the Editor panel. |
When the environment is set to use an external text editor on the Option dialog box, the file is opened with the external text editor that has been set. |