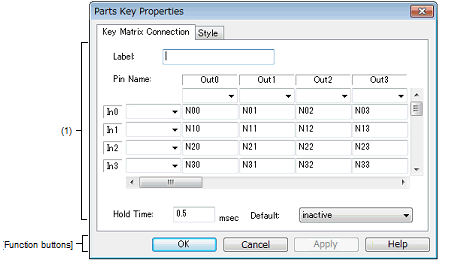
This property dialog box is used to set or change the pin connection information of a key matrix, which is one of the connection parts in the I/O Panel window.
Input to the simulator can be done from pin-connected keys in the Simulation mode.
A key matrix consisting of input pins and output pins of up to 16 x 16 can be set.
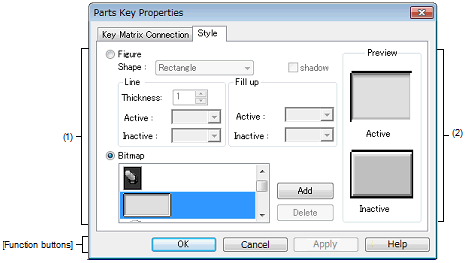
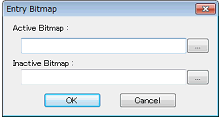
Either figure or bitmap can be selected as the key matrix display style. These styles can be changed on the [[Style] tab].
When connecting a key matrix to pins, also perform the Pull up/Pull down settings for the connection pins. When a key is pressed, the output value of the output pin connected to that key is input to the input pin connected to that key. The value when the key is not pressed is the value specified in the Pull up/Pull down dialog box. |


This section describes the following.
On the I/O Panel window, any one of the following:
|
This area is used to specify the part name. The part name input here is also displayed in the Parts List dialog box as the label. |
||
|
This area is used to specify the pin name to be connected (input pins and output pins). The connection pins can be specified either via direct input or through selection from the drop-down list. This area can be used to set 16 x 16 pins using the scrollbar. |
||
|
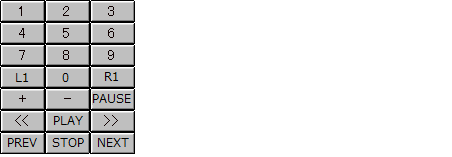
This area is where the text strings displayed on the keys of the key matrix are specified. Text strings of any length can be specified. The default description string (N number) is not displayed on the keys. |
||
|
Specify the time (hold time) for which the input value is to be held (default: 0.5msec). The settable range is from 0.001 to 999 (msec). Moreover, when multiple keys for input to the same input pin are pressed during the hold time, only the key that was clicked last is valid. |
||
|
No key matrix buttons are depressed after CPU reset (default). |
||
For the pin names that can be specified, see the user's manual of the microcontroller that is used. |
This area displays the style of the key matrix currently being specified.
In the Simulation mode, the following operation can be done.
(1) Inputting multiple keys simultaneously
(2) Locking the key input value
To enter two keys, simultaneously press the key to be input and right-click the mouse to enter the wait status. Then, click the other key. This releases the wait status and enables simultaneous input of both keys. Multiple keys can be simultaneously input by setting the wait status for multiple keys, but if input is to be performed to the same input pin, the key that was input last is valid.
To enter two keys, simultaneously press the key to be input and right-click the mouse to enter the wait status. Then, click the other key. This releases the wait status and enables simultaneous input of both keys. Multiple keys can be simultaneously input by setting the wait status for multiple keys, but if input is to be performed to the same input pin, the key that was input last is valid

