You can convert a CubeSuite project into a CS+ project. Select [Open Project...] from the [Project] menu with CS+, and then select a project file (*.cspj).
When a CubeSuite project file is selected, the following message dialog box will open.
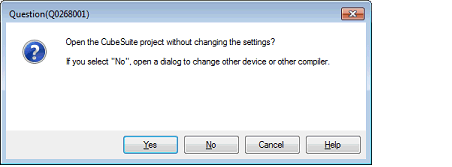
If you select the [Yes] button, the CubeSuite project settings are left unchanged, and the conversion to a CS+ project is carried out.
To change the microcontroller or project name, click the [No] button (continue to (2)).
The Project Convert Setting dialog box will open.
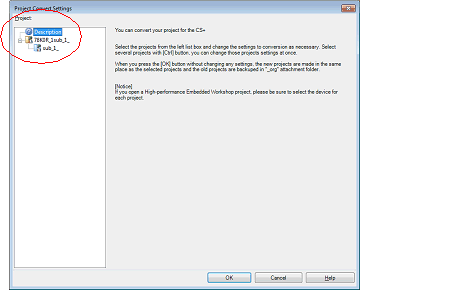
The [Project] area shows the configuration of conversion target projects as a tree; select the project for carrying out the conversion settings.
When you select the project, the area on the right shows the conversion target project setting items.
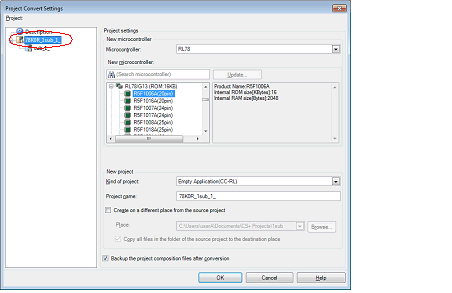
After setting the microcontroller to be used for the conversion target project, and project type, name, and place of creation settings, click the [OK] button.
If you select [Backup the project composition files after conversion], immediately after the conversion the project source files and complete project are packed up and saved. |
See "Project Convert Setting dialog box" for details about each setting item. |
The CubeSuite project is converted to the CS+ project.
A CubeSuite project is converted to a CS+ project according to the rule below.
A CubeSuite project is converted to a project with the same name as the original project. After conversion, the project file name will be "project name.mtpj". |
The project file after conversion is created in the folder the CubeSuite project file was placed in. If there is already a project file with the same name, "_number_" (number: 1, 2, ...) will be added to the file name. |
The build mode and build options information is not the target for conversion, if the build tool is different from the CubeSuite project file. |