|
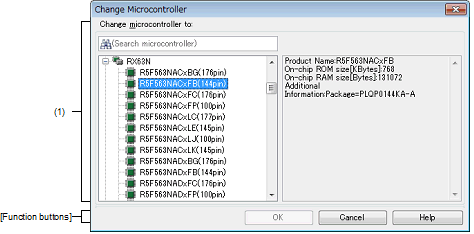
Change Microcontroller dialog box
|
This dialog box is used to change the microcontroller to be used in the project.
Figure A.8 | Change Microcontroller Dialog Box |
The following items are explained here.
[How to open]
- | On the Project Tree panel, select the microcontroller node, and then select [Change microcontroller...] from the context menu. |
[Description of each area]
(1) | [Change microcontroller to] area |
Select a microcontroller to be used.
(a) | Microcontroller search box |
You can search a microcontroller selected in the list of microcontrollers simply.
(b) | List of microcontrollers |
Select a microcontroller.
The microcontrollers can be specified are listed and categorized by their nicknames.
The following information on the selected microcontroller that is used in the project is shown in the box at right.
- | On-chip ROM size [Kbytes] [RX] |
- | Internal ROM size [Kbytes] [RH850][RL78] |
- | On-chip RAM size [Bytes] [RX] |
- | Internal RAM size [Bytes] [RH850][RL78] |
- | Additional InformationNote |
Note | Other information appears only when present. |
[Function buttons]
|
|
|
|
OK
|
Closes this dialog box and changes the microcontroller according to the designated condition.
Note that this button is invalid when the target microcontroller after the change is the same as the current microcontroller or is selected by its nickname from the list of microcontrollers.
|
|
Cancel
|
Cancels the designated condition and closes the dialog box.
|
|
Help
|
Displays the help of this dialog box.
|
