12. Quick Start for Renesas R-Car
12.1. Supported Environments
Operating System |
Windows: Windows 10 / Windows 11 Linux: Ubuntu 22.04 |
VS Code version |
1.102.0 (minimum) |
VS Code can be downloaded and installed from this page https://code.visualstudio.com/.
12.2. Installation
Please choose your operating system for operating system dependent installation steps.
Installing Python 2.7 (32-bit):
Install the 32-bit version of the Python 2.7.18 (Important!: 32-bit Python is needed even in 64-bit OS environment).
Add the path of the Python 2.7.18 installation into the “Path” environment variable.
Guide to add Python 2.7 folder into the “Path” environment variable
Use Window search to find and open “Edit the system environment variables”
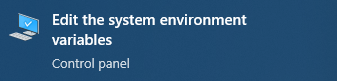
In “Advanced” tab, click on “Environment Variables…” button to open “Environment Variables” dialog
Select to edit “Path”
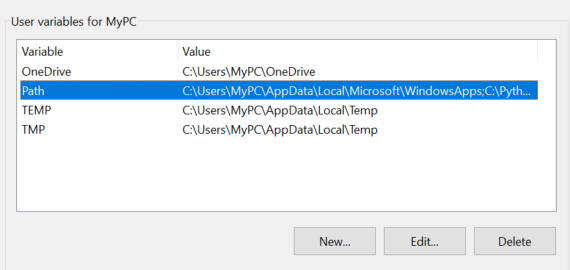
Add the path of Python folder

Click OK to close the dialog
Setting up a build environment with MinGW over MSYS2 for Windows
R-Car and RZ/N families require MinGW Makefiles in the development environment on Windows. Please, install CMake and MSYS2 packages.
Step 1: Install the latest CMake version for Windows.
Download the latest version of CMake for Windows.
Install CMake for Windows.
Important!: You must add the CMake folders to the Path environment variable. The Windows Installer of CMake has an option to modify the system’s environment variables and add the CMake folders to the Path variable. Please select this option during installation. If you are not using the installer or this option is not selected during installation, please use the notes at step 3 to manually add CMake’s bin folder to the Path variable.
Step 2: Install and configure the latest MSYS2 package.
Download the latest version of the MSYS2 package.
Install the MSYS2 package. The MSYS2 package will automatically install the MinGW environment.
Use Windows Search to find and open [MSYS2 MINGW64] terminal.
Install the make package for MinGW64 using pacman package manager.
pacman -S mingw-w64-x86_64-make
Check if make package is installed correctly.
mingw32-make --versionSee also
make package is a 32-bit package. You can install it by using “MSYS2 MINGW32” terminal instead of “MSYS2 MINGW64” terminal. If you are using “MSYS2 MINGW32” then run the following command for the installation:
pacman -S mingw-w64-i686-make
Also, please make sure you include the correct folder for the Path environment variable in the next step (e.g. C:\msys64\mingw32\bin).
Step 3: Configure the Path environment variable.
Use Windows Search to find and open [Edit the system environment variables]
In the [Advanced] tab, click on the [Environment Variables…] button to open the [Environment Variables] dialog.
Select to edit the Path.
Add the path of CMake’s bin folder if it is not defined during the CMake installation.
(e.g. C:\Program Files\CMake\bin)
Add the path of the MSYS2 and MinGW bin folders.
(e.g. C:\msys64\usr\bin, C:\msys64\mingw64\bin)
Installing Emulator Drivers
You may need to download and install additional USB drivers for establishing a proper connection with the emulators and devices.
Using Renesas E2/E2Lite Emulators:
If you are using Renesas Emulators, please install the latest drivers before starting your debug session. Use the following link to download the drivers suitable for your operating system and device:
Using SEGGER J-Link Connection:
Install the latest SEGGER J-Link drivers before starting your debug session. Use the following link to download the J-Link drivers suitable for your operating system:
Installing the Dependent Packages:
Run the following commands to refresh the package lists, and install the dependent packages:
sudo apt update
sudo apt install cmake ninja-build libusb-1.0-0-dev python3.10-dev
For debugging in device family R-Car:
Install Python 2.7 libraries for debugging in R-Car device family. Use the following command to install the required libraries:
sudo apt install python2.7-dev
12.3. Creating and Building Projects
Please check the following advanced guidelines for developing Renesas R-Car projects.
Setup environment and debug multicore CA55 with CR52 using renesas-amalgamator
Setup environment and debug project ARM & G4MH using renesas-amalgamator
Setup environment and debug multi-core ARM device R-Car S4 (CA55: CPU0 to CPU7)
Setup environment and debug multi-core G4MH device R-Car S4 or device RH850
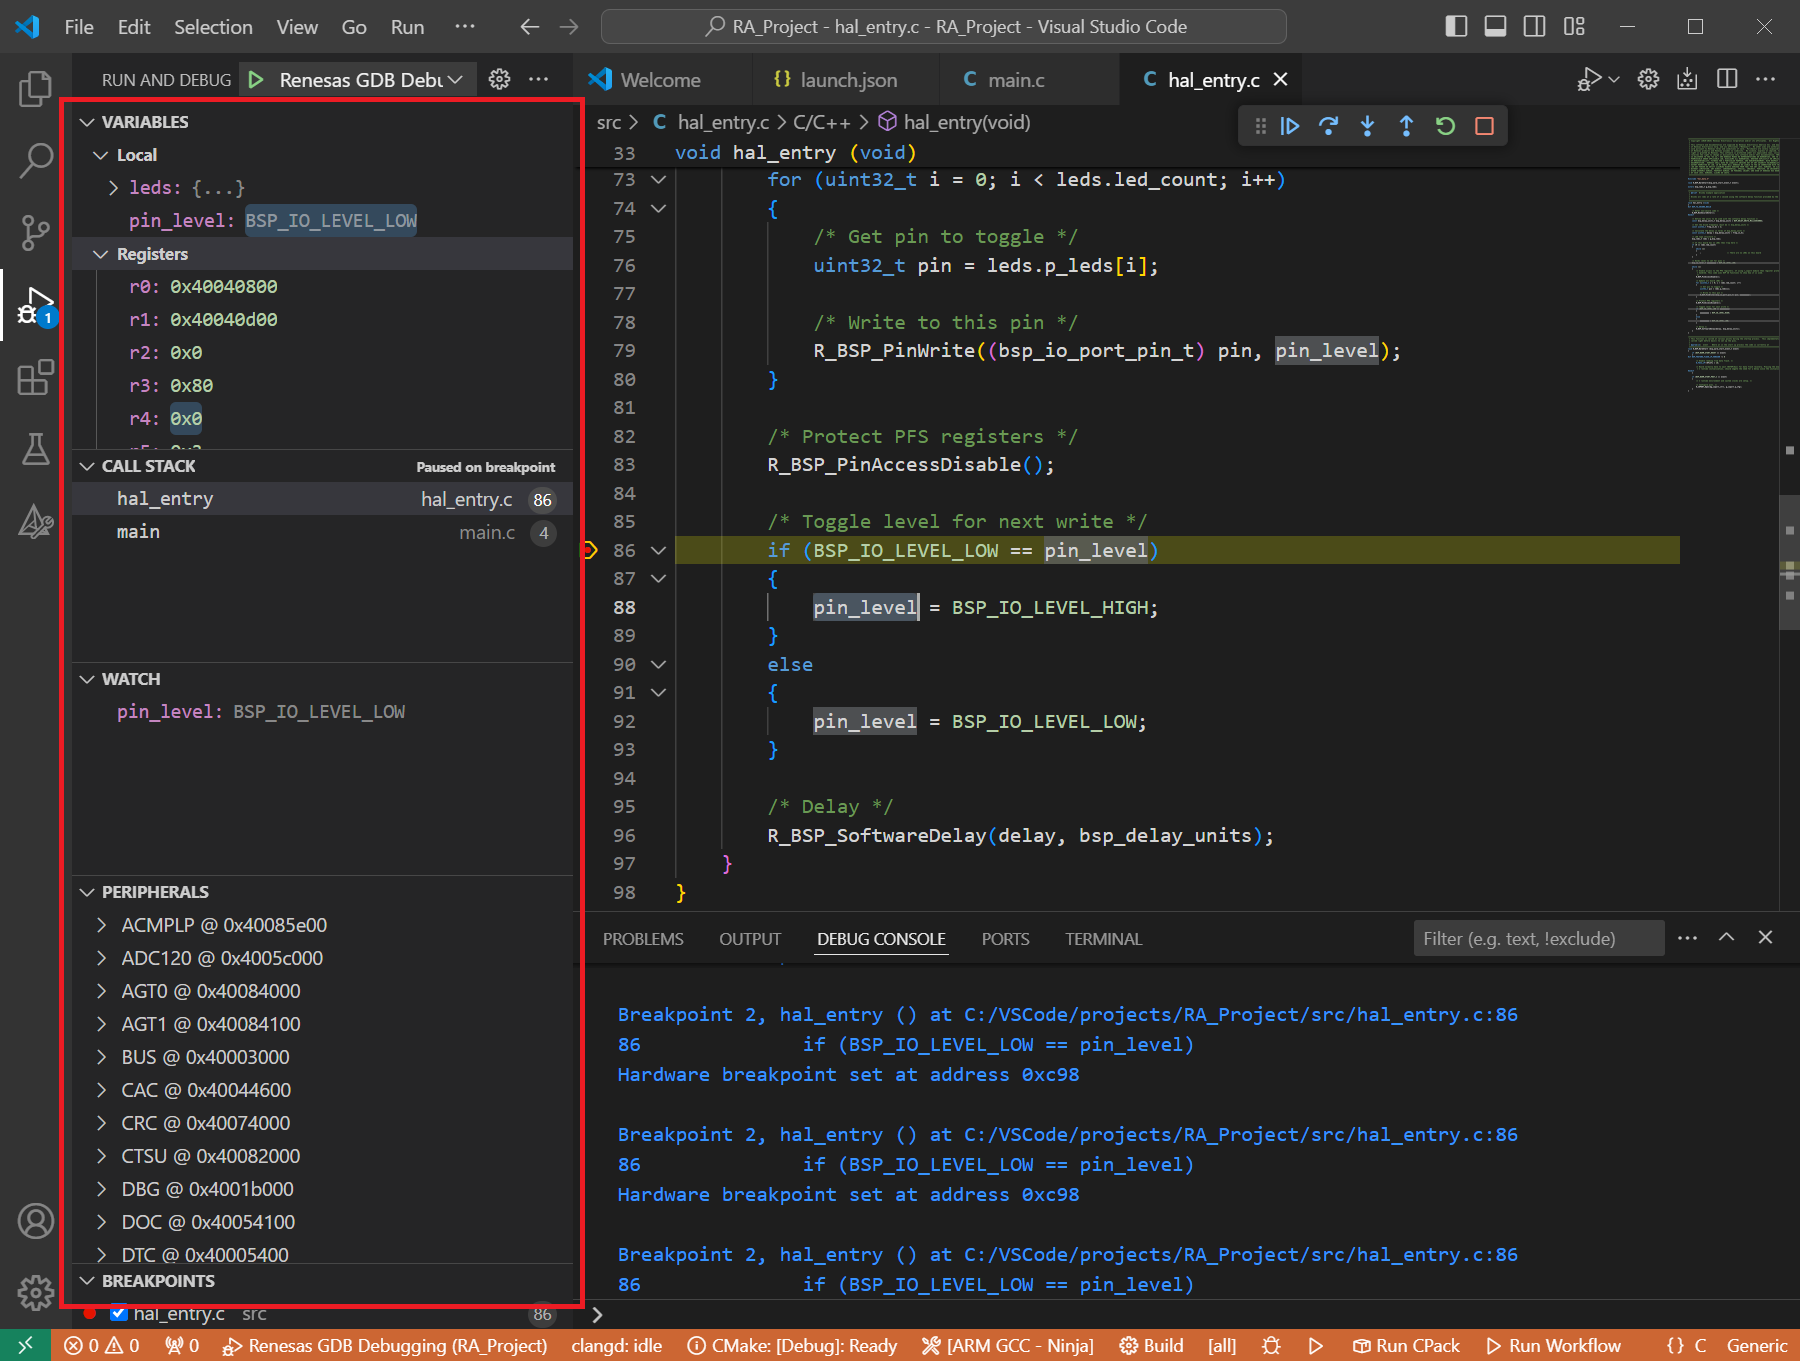
12.4. Debugging the Project
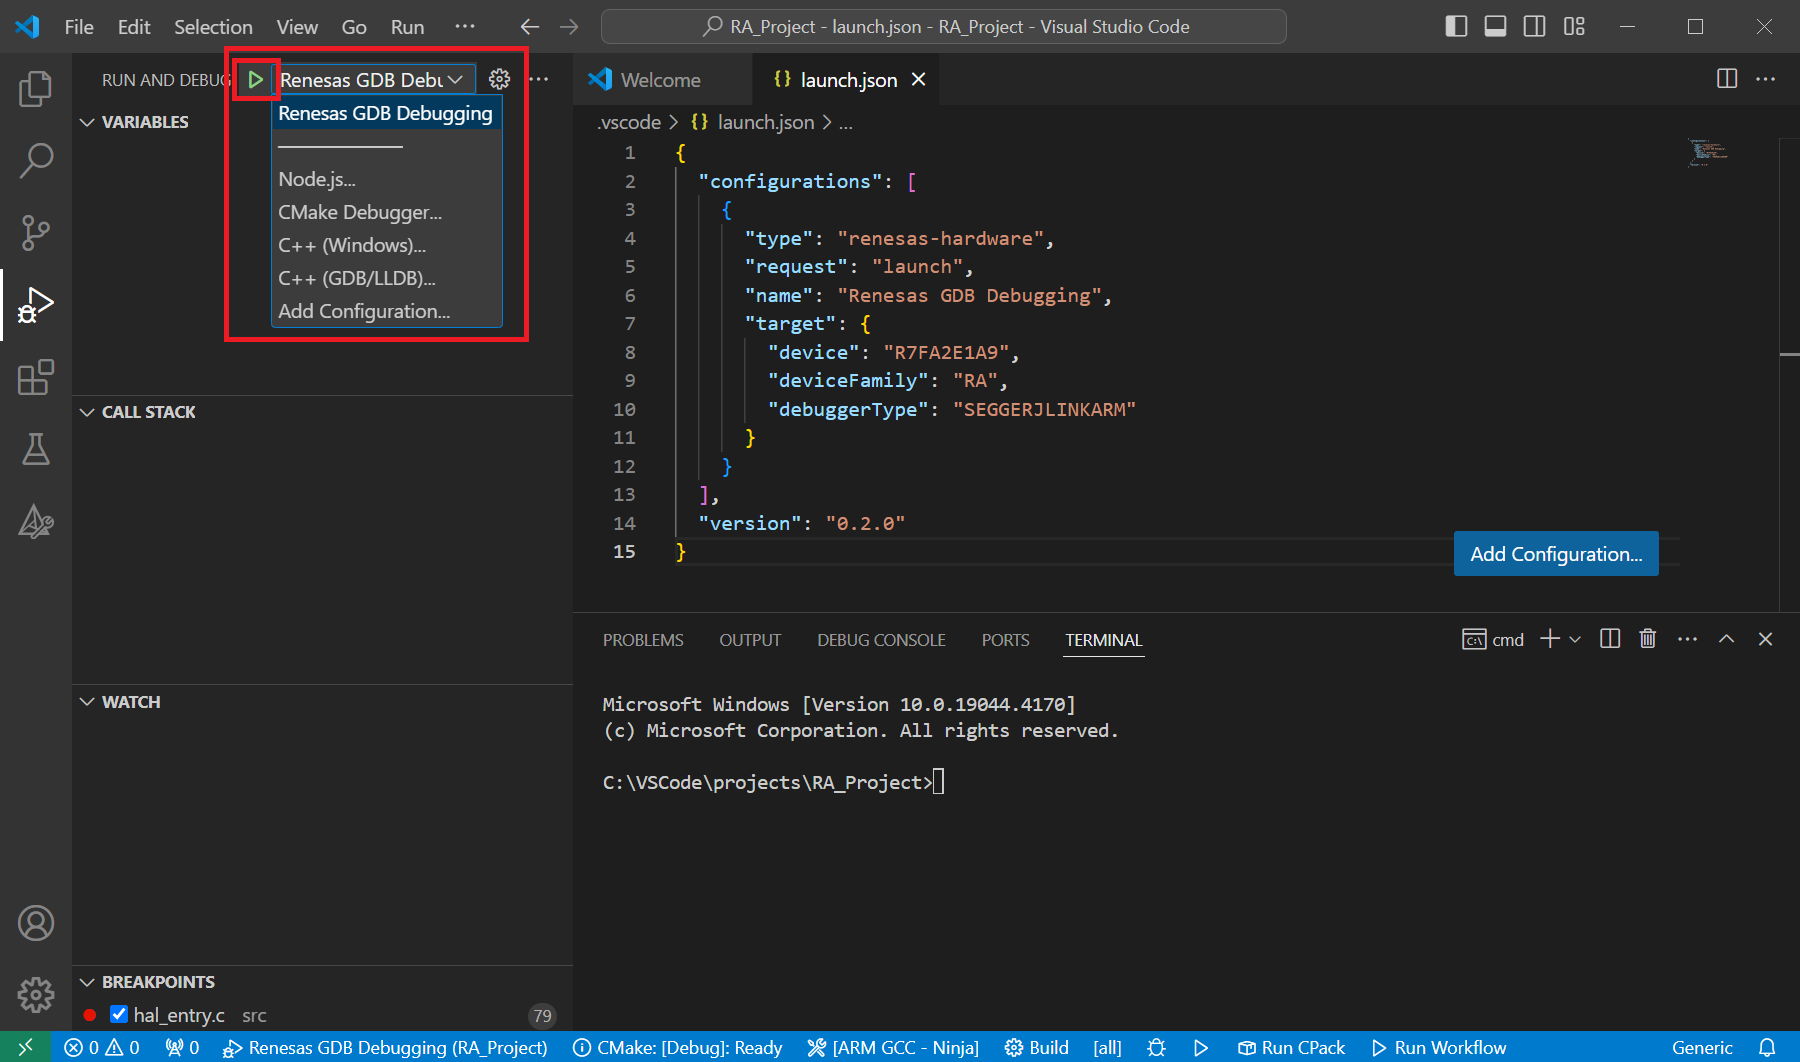
A debug session can be started by selecting the created configuration and clicking the [Start Debugging] button in the [Run and Debug] tab, or pressing [F5] from the keyboard.
When VS Code starts the debug session, common debug control flow functions like resume, suspend, step into, step over, step out, restart, terminate debug session can be performed via the debug flow control buttons. Also, the [Debug Console] view will contain useful messages during the debug session.
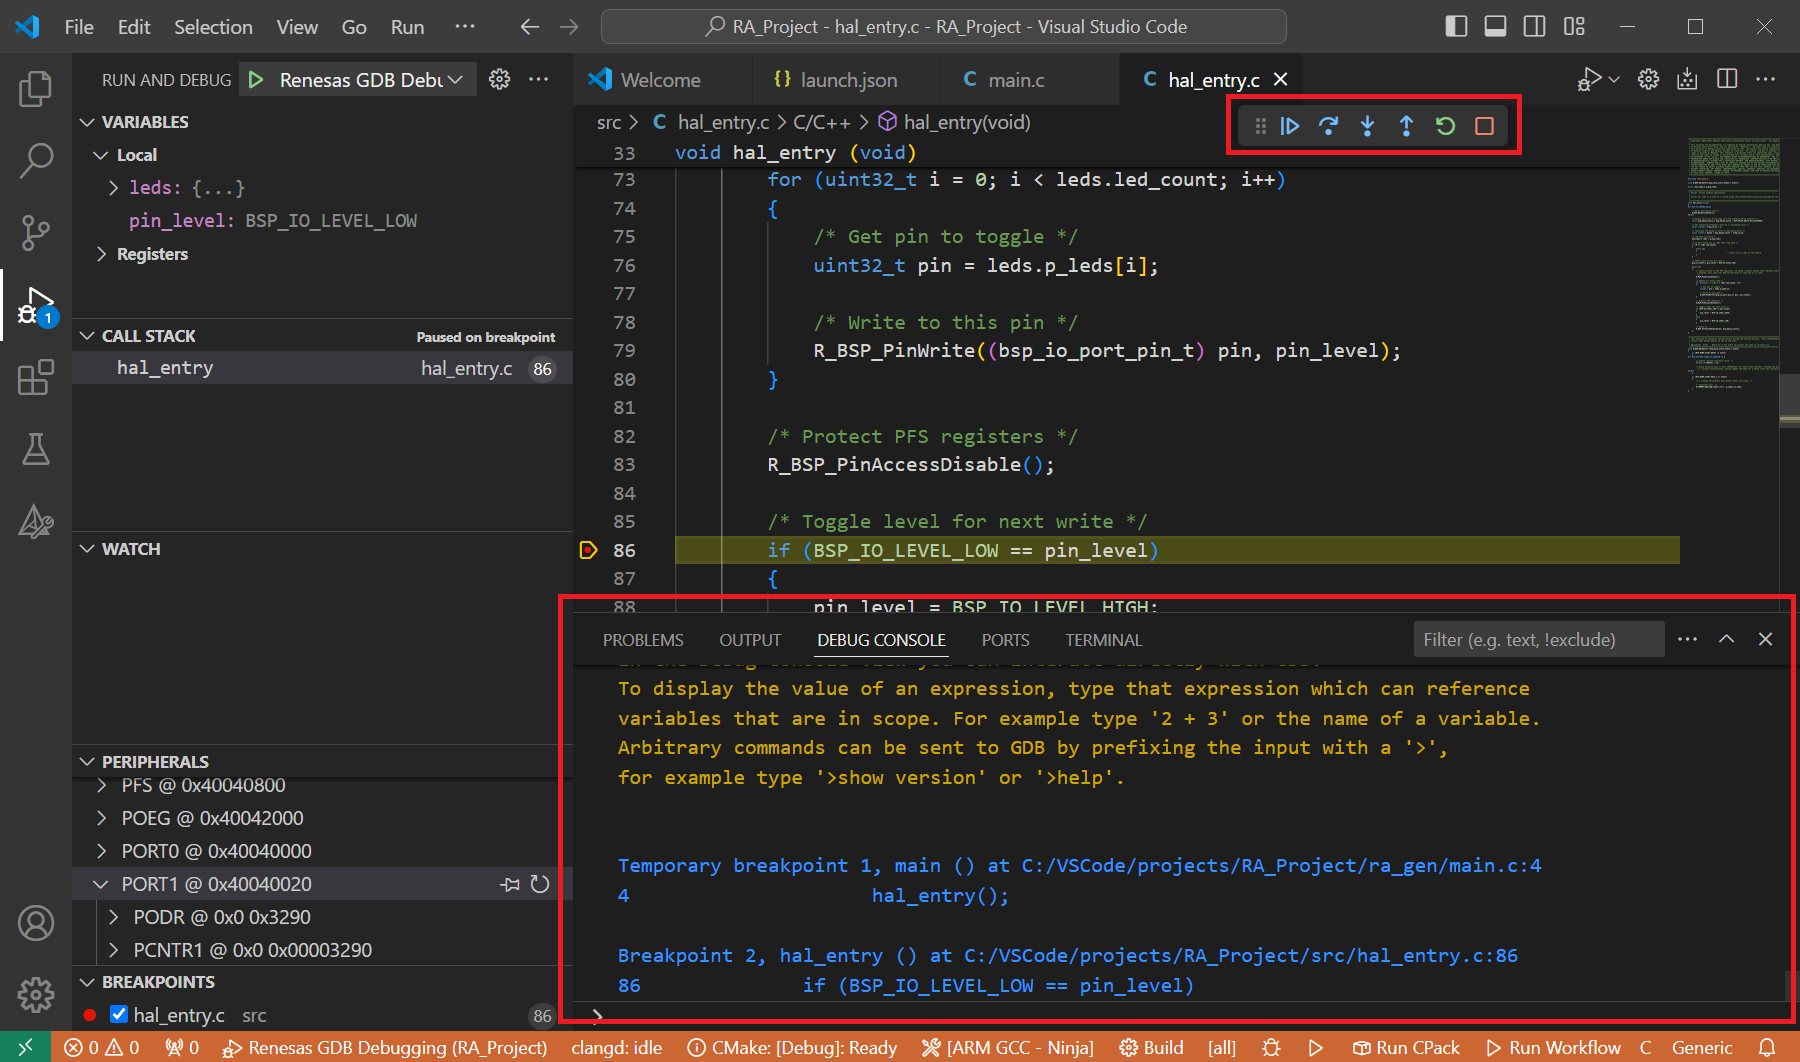
During the debug session, details about the local variables, device registers, call stack, watched variables, states of the peripherals can be accessed at the primary sidebar of VS Code in the [Run and Debug] tab.