2. Renesas 365
2.1. Overview
Renesas 365 is a cloud-connected platform integration built into the VS Code extension. It allows developers to authenticate with the Renesas 365 cloud service, manage cloud workspaces, register and migrate embedded projects (primarily RA/FSP projects), synchronise SDM (Software Design Model) files, and browse and open cloud-hosted software solutions and projects — all from within the IDE.
2.2. Getting Started with Renesas 365
To get started with Renesas 365, visit the Renesas Electronics website and register for a MyRenesas account:
Once registered, you will have access to the full suite of Renesas 365 services, including software downloads, licence management, and personalised support.
2.3. VS Code Features
The Renesas 365 extension for Visual Studio Code provides the following features:
Signing in to Renesas 365 – Authenticate and connect to your Renesas 365 account directly from within VS Code.
Signing out of Renesas 365 – Sign out of your Renesas 365 account from within VS Code.
Switching Workspaces in R365 – Seamlessly switch between different Renesas 365 workspaces without leaving the editor.
Viewing Solutions and Software Projects – Browse and inspect the solutions and software projects available inside your Renesas 365 workspace.
Open a Renesas 365 Workspace in the Browser – Launch your current Renesas 365 workspace directly in the web browser for full portal access.
Solutionise an RA Smart Configurator Project – Convert and integrate an RA Smart Configurator project into a Renesas 365 solution as a software project, or register an existing local project with Renesas 365.
Push & Pull Changes – Synchronise changes between a Renesas 365 software project and a user’s
.sdm_jsonfile, keeping local and remote configurations in sync.
2.4. Signing in to Renesas 365
Before accessing any Renesas 365 resources from within VS Code, you must first sign in to your Renesas 365 account. There are three ways to do this:
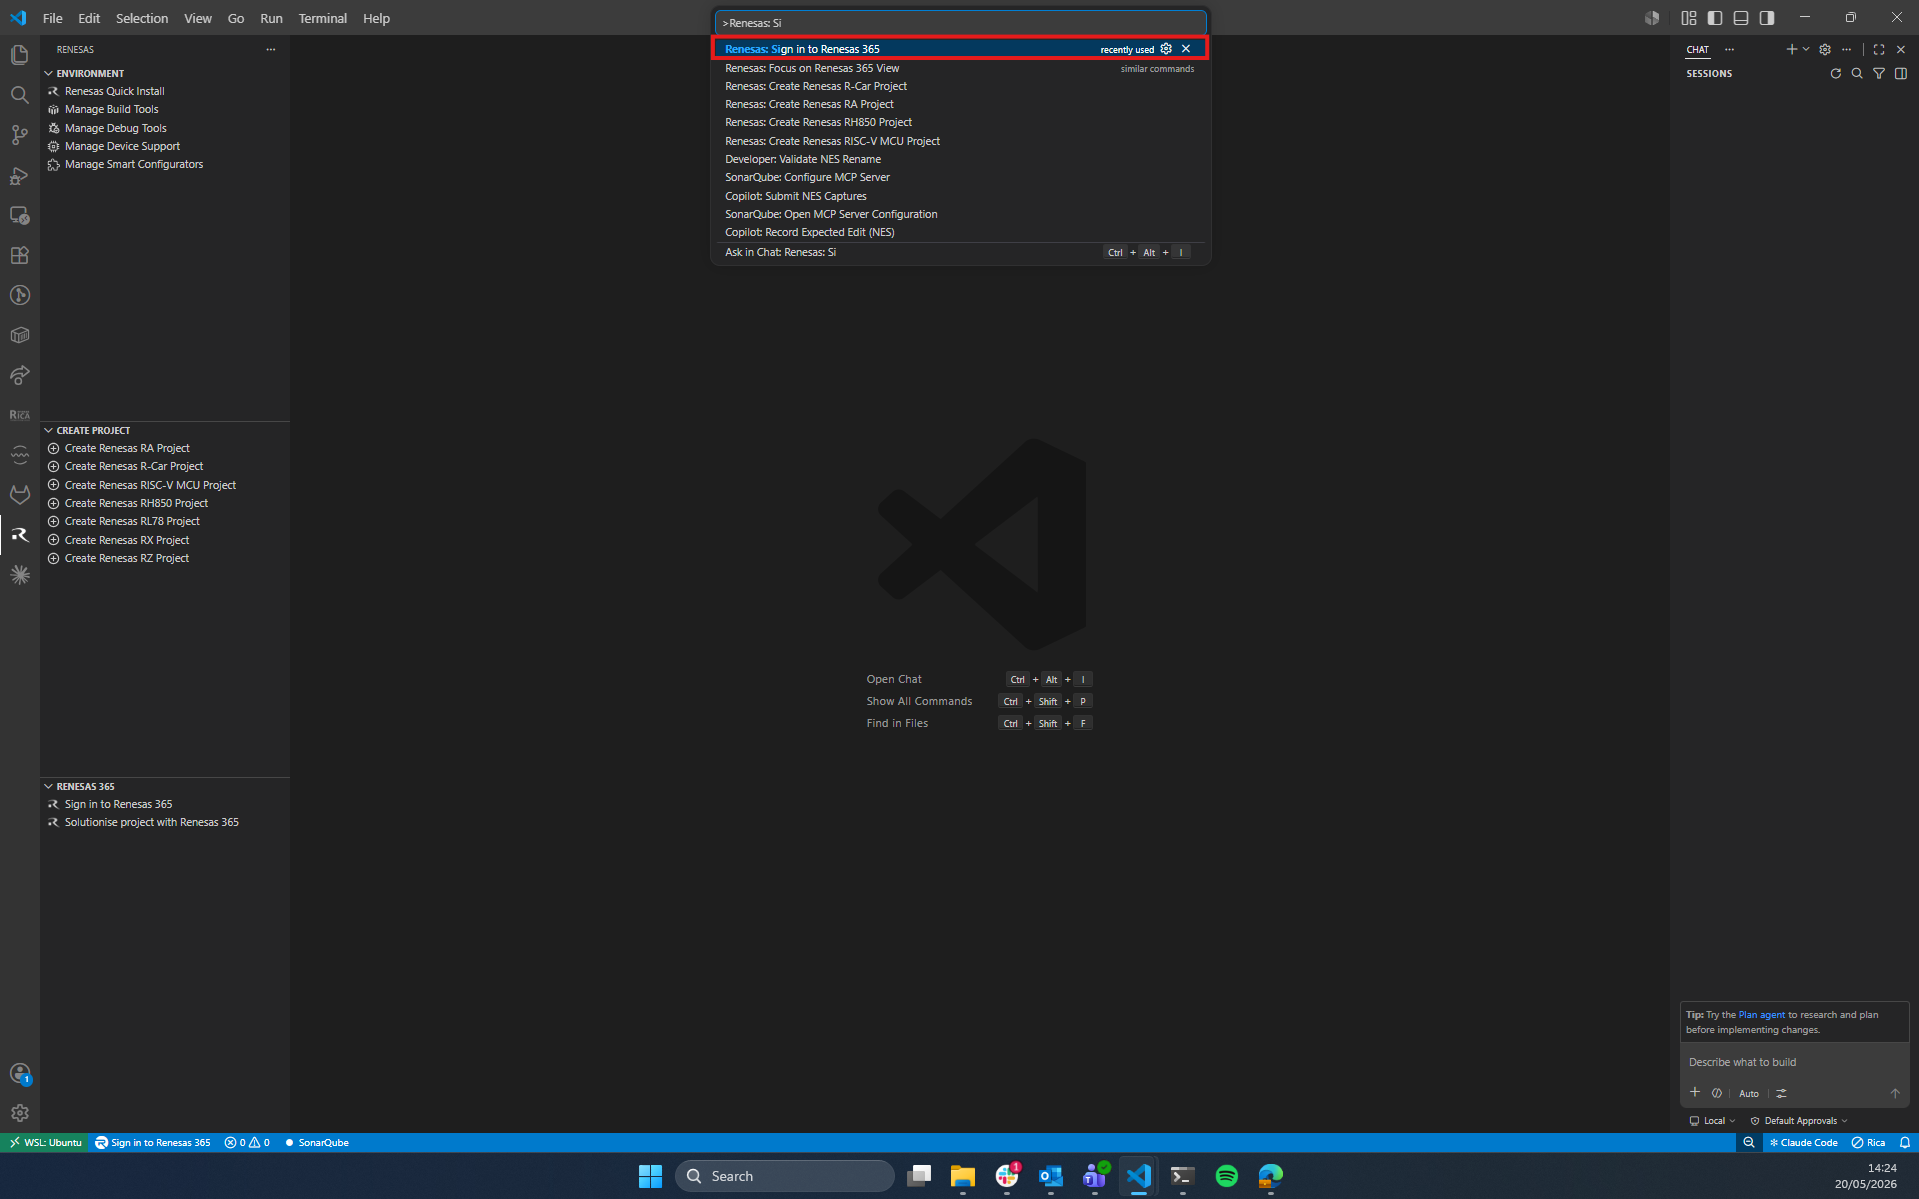
2.4.1. Using the Command Palette
Open the Command Palette by pressing
Ctrl+Shift+P(Windows/Linux) orCmd+Shift+P(macOS).Type and select Renesas: Sign in to Renesas 365.
A browser window will open prompting you to enter your Renesas 365 credentials.
Once authenticated, you will be redirected back to VS Code and signed in.
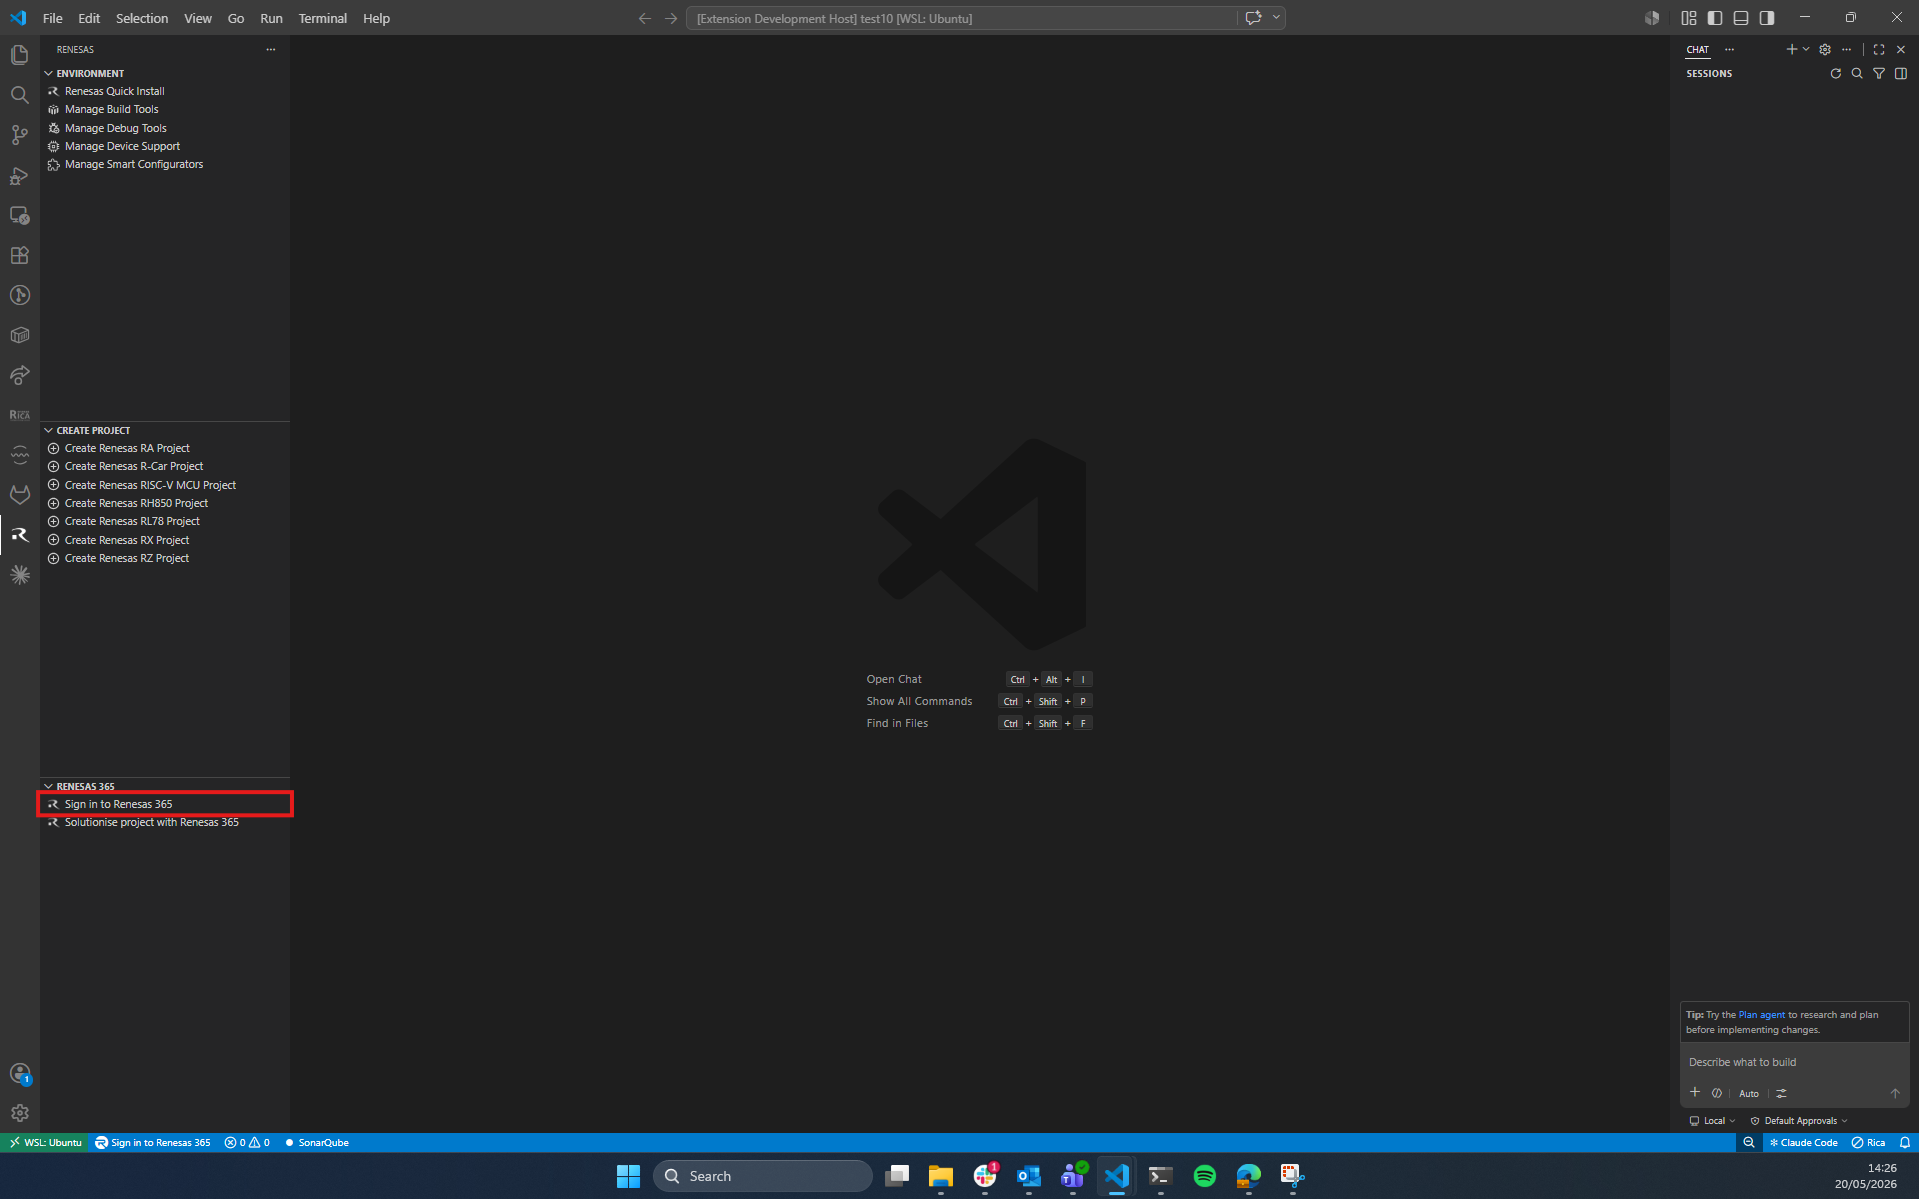
2.4.2. Using the Sidebar Button
A sign-in button is available directly within the Renesas sidebar panel:
Open the Renesas tab from the VS Code sidebar.
Locate the Renesas 365 section within the panel.
Click the Sign into Renesas 365 button displayed in the section.
A browser window will open prompting you to enter your Renesas 365 credentials.
Once authenticated, you will be redirected back to VS Code and signed in.
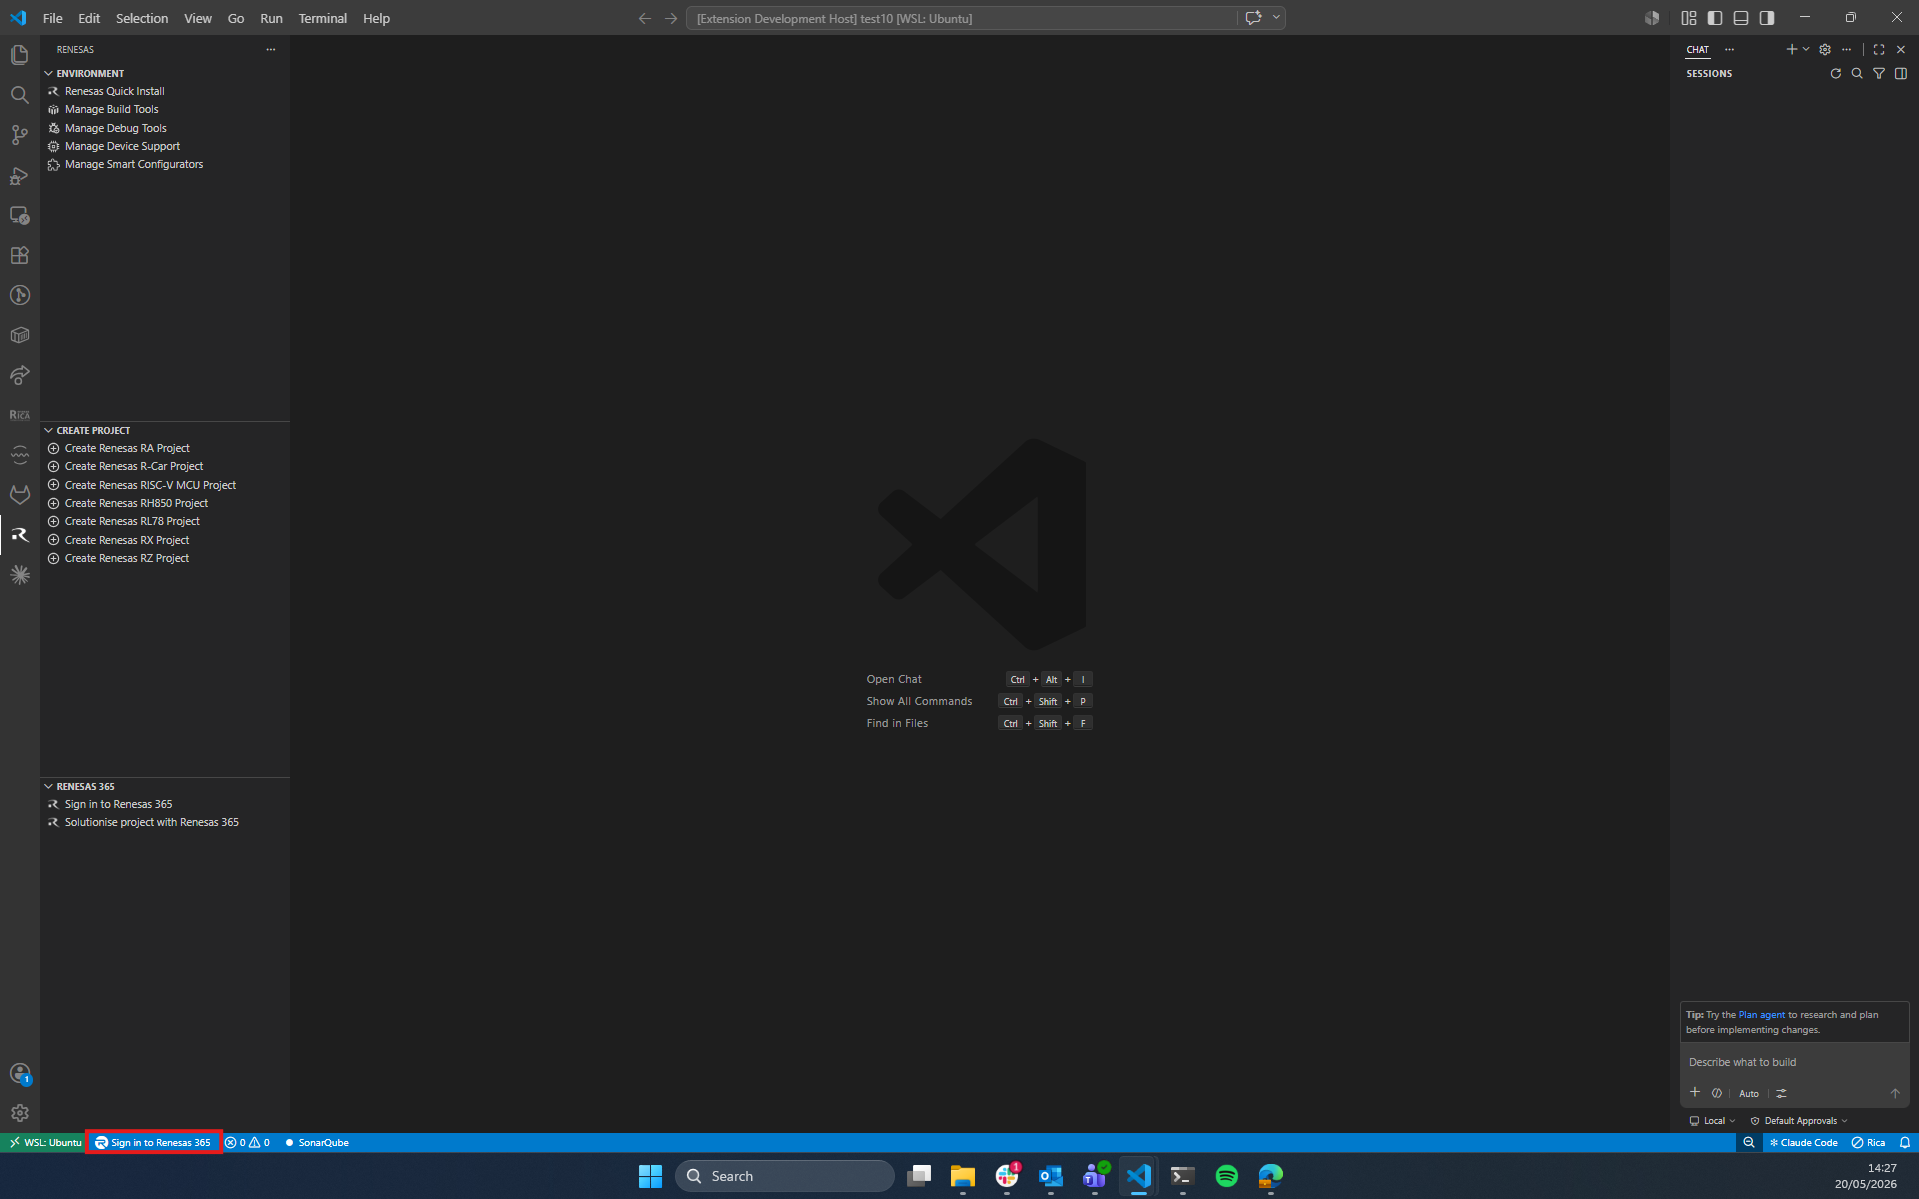
2.4.3. Using the Activity Bar
A quick-access sign-in button is also available directly from the VS Code Activity Bar:
Locate the Renesas icon in the Activity Bar on the left-hand side of VS Code.
Click the Sign into Renesas 365 button.
A browser window will open prompting you to enter your Renesas 365 credentials.
Once authenticated, you will be redirected back to VS Code and signed in.
Note
Your session is persisted securely using VS Code’s built-in secret storage. You will not need to sign in again unless your token expires or you explicitly sign out.
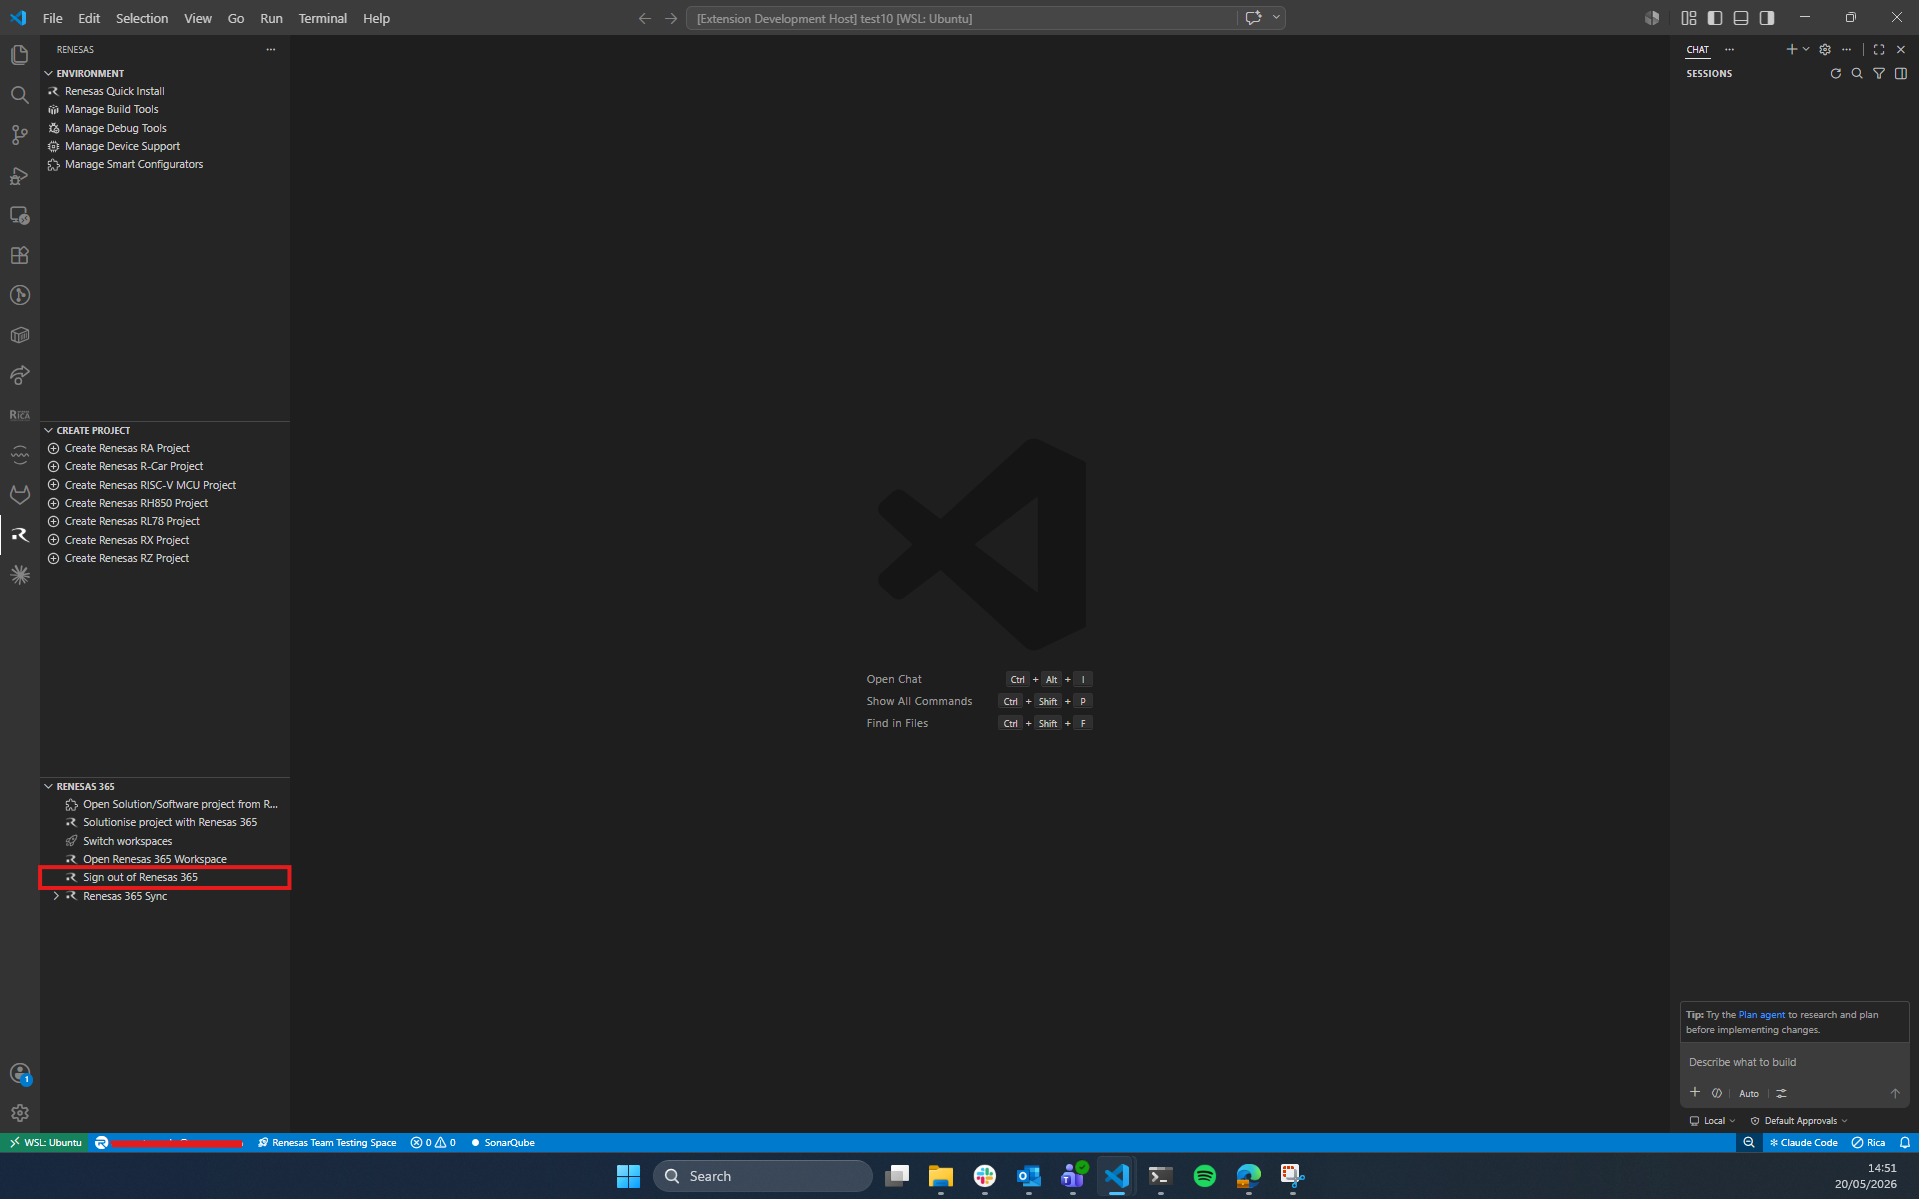
2.5. Signing out of Renesas 365
You can sign out of your Renesas 365 account at any time from within VS Code. There are three ways to do this:
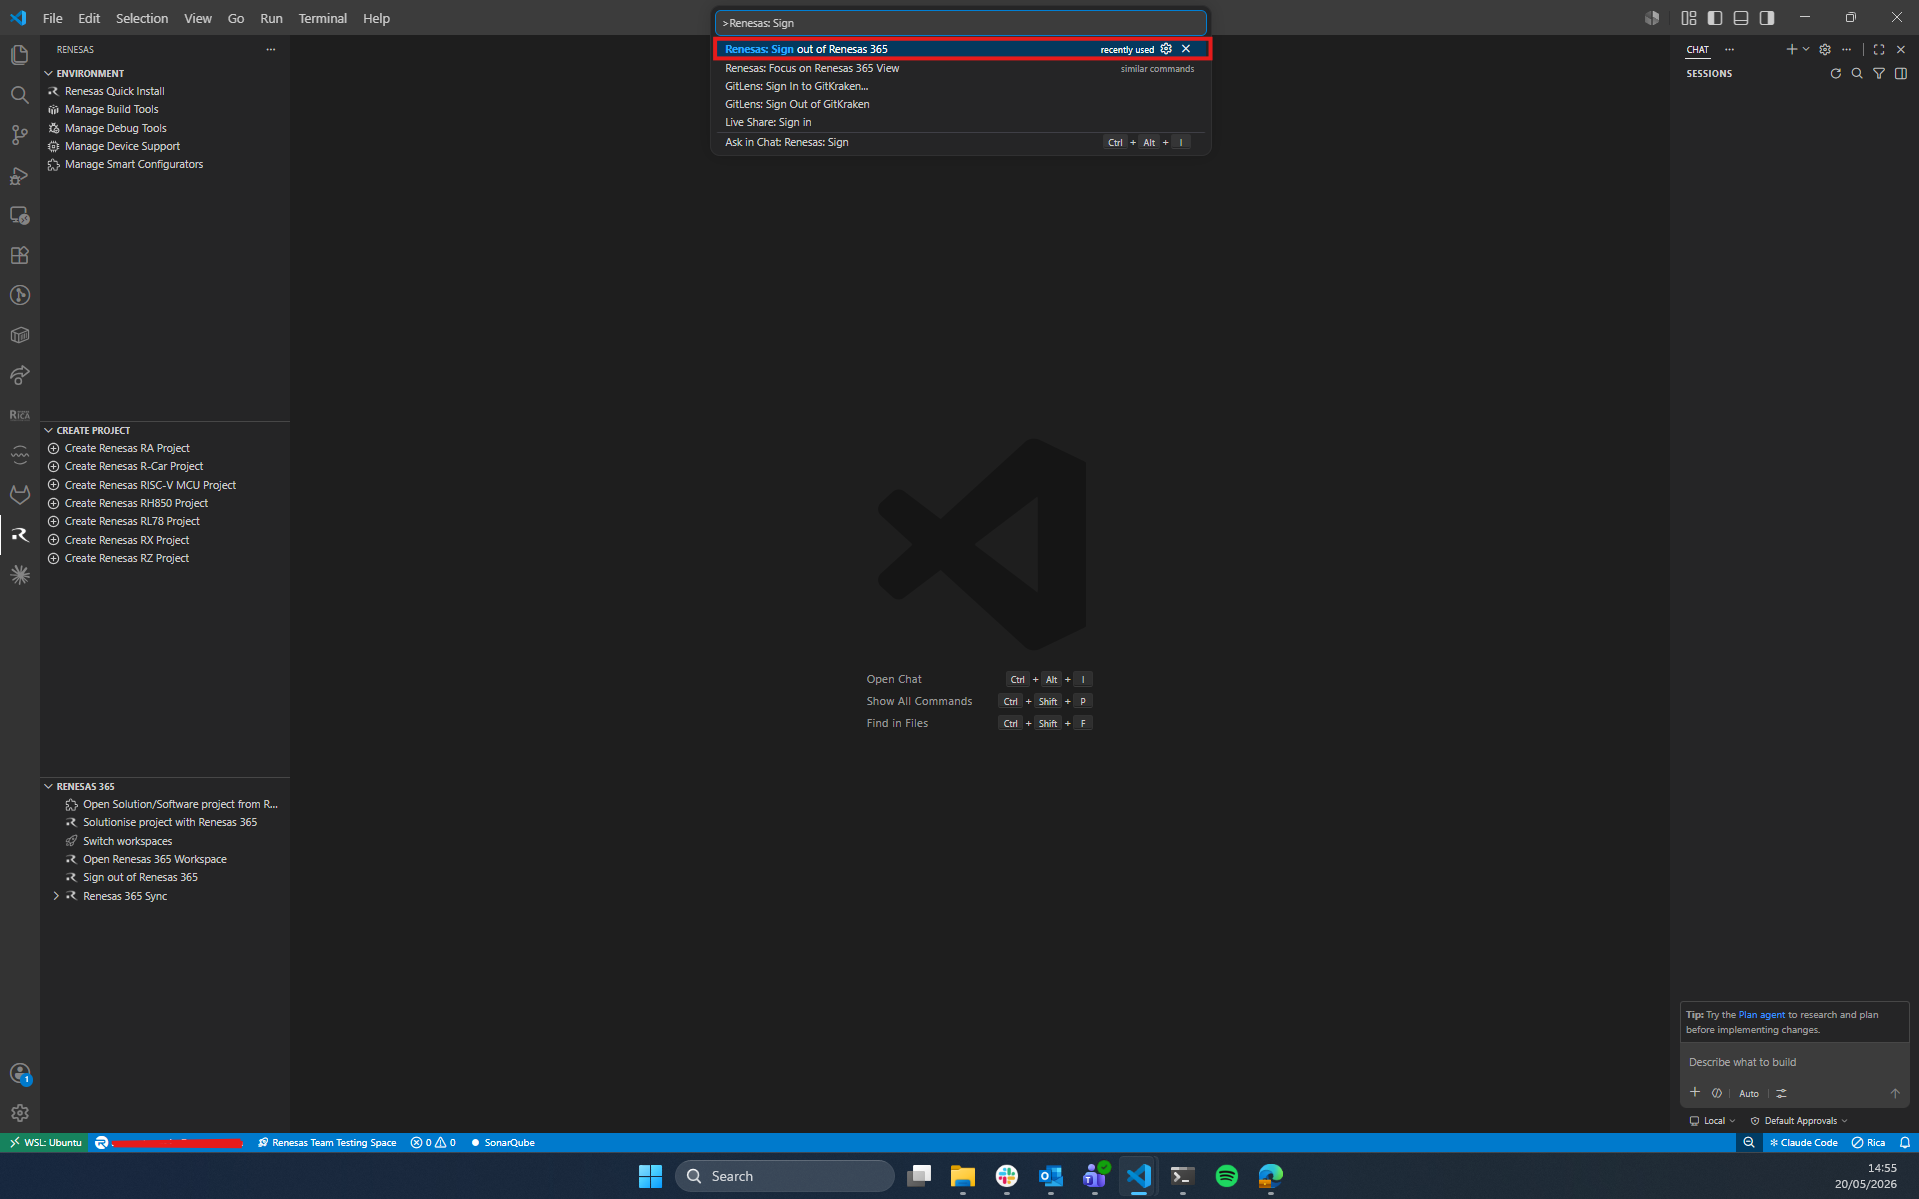
2.5.1. Using the Command Palette
Open the Command Palette by pressing
Ctrl+Shift+P(Windows/Linux) orCmd+Shift+P(macOS).Type and select Renesas: Sign out of Renesas 365.
You will be signed out of your Renesas 365 account and the session will be cleared.
2.5.2. Using the Sidebar Button
A sign-out button is available directly within the Renesas sidebar panel:
Open the Renesas tab from the VS Code sidebar.
Locate the Renesas 365 section within the panel.
Click the Sign out of Renesas 365 button displayed in the section.
You will be signed out of your Renesas 365 account and the session will be cleared.
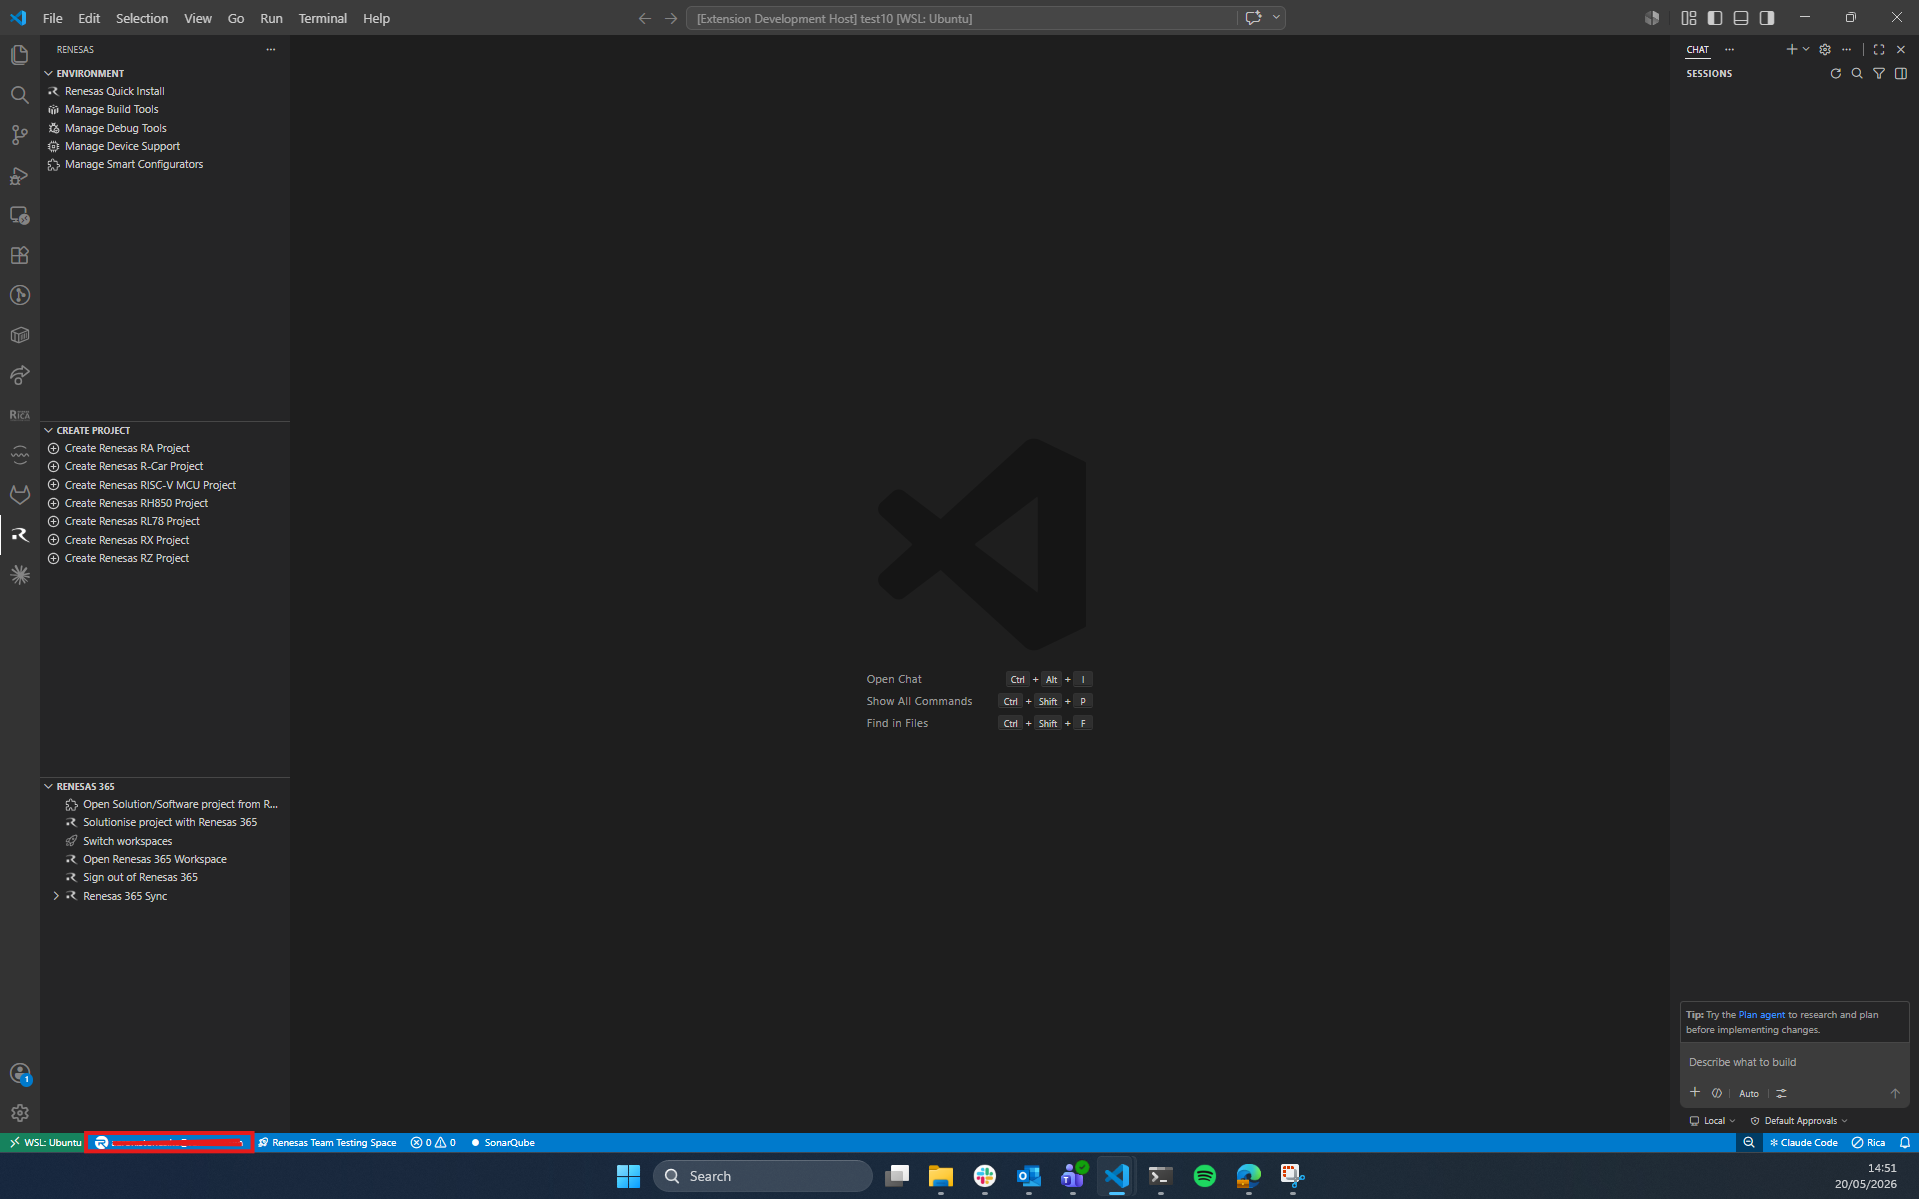
2.5.3. Using the Activity Bar
A sign-out option is also accessible directly from the VS Code Activity Bar:
Locate the Renesas icon in the Activity Bar on the left-hand side of VS Code.
Click the Sign out of Renesas 365 button.
You will be signed out of your Renesas 365 account and the session will be cleared.
2.6. Switching Workspaces in R365
Once signed in to Renesas 365, you can switch between available workspaces at any time. There are three ways to do this:
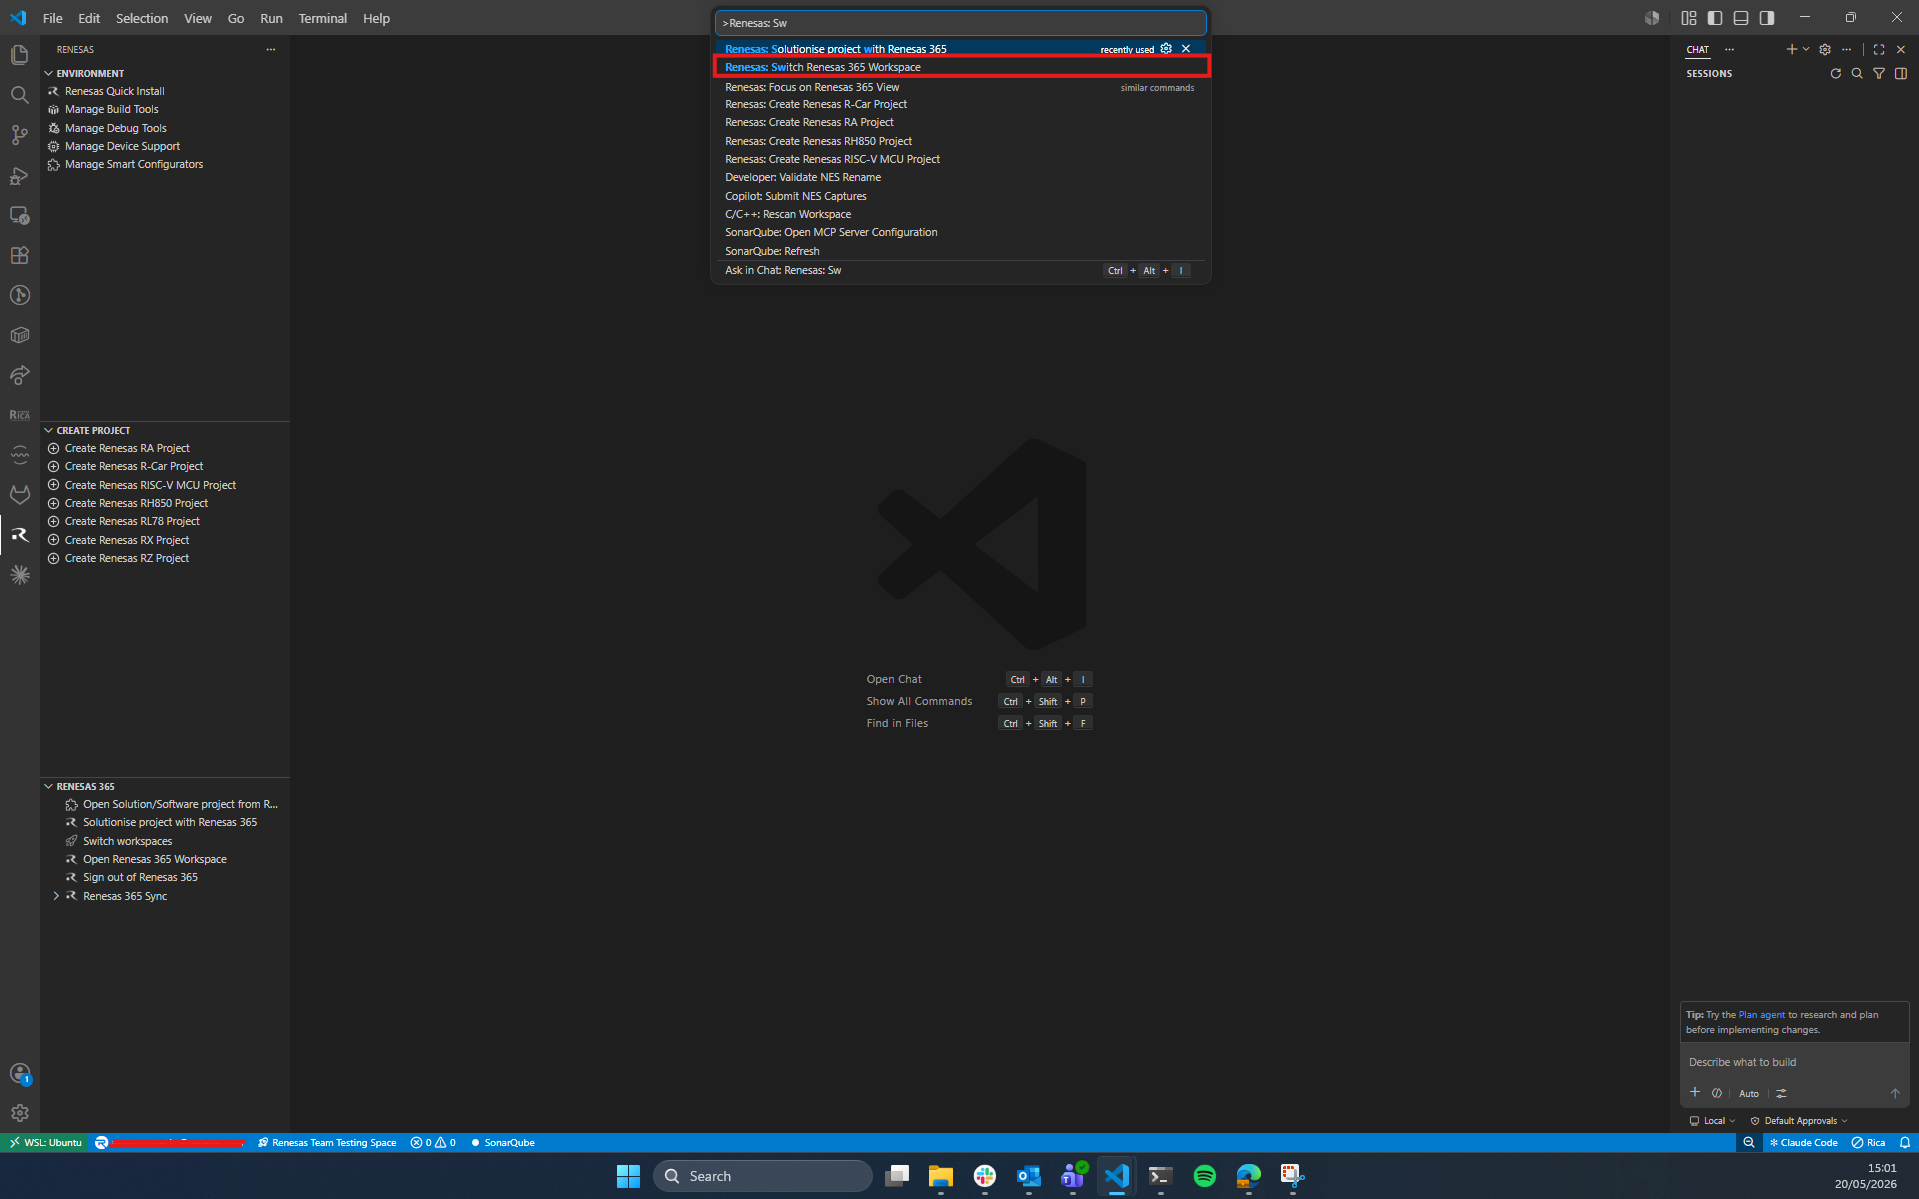
2.6.1. Using the Command Palette
Open the Command Palette by pressing
Ctrl+Shift+P(Windows/Linux) orCmd+Shift+P(macOS).Type and select Renesas: Switch Renesas 365 Workspace.
A list of available Renesas 365 workspaces associated with your account will be displayed.
Select the workspace you wish to switch to. The extension will exchange your access token for a workspace-scoped token and update the status bar accordingly.
2.6.2. Using the Sidebar Button
A switch workspace button is available directly within the Renesas sidebar panel:
Open the Renesas tab from the VS Code sidebar.
Locate the Renesas 365 section within the panel.
Click the Switch Workspace button displayed in the section.
A list of available Renesas 365 workspaces associated with your account will be displayed.
Select the workspace you wish to switch to. The extension will exchange your access token for a workspace-scoped token and update the status bar accordingly.

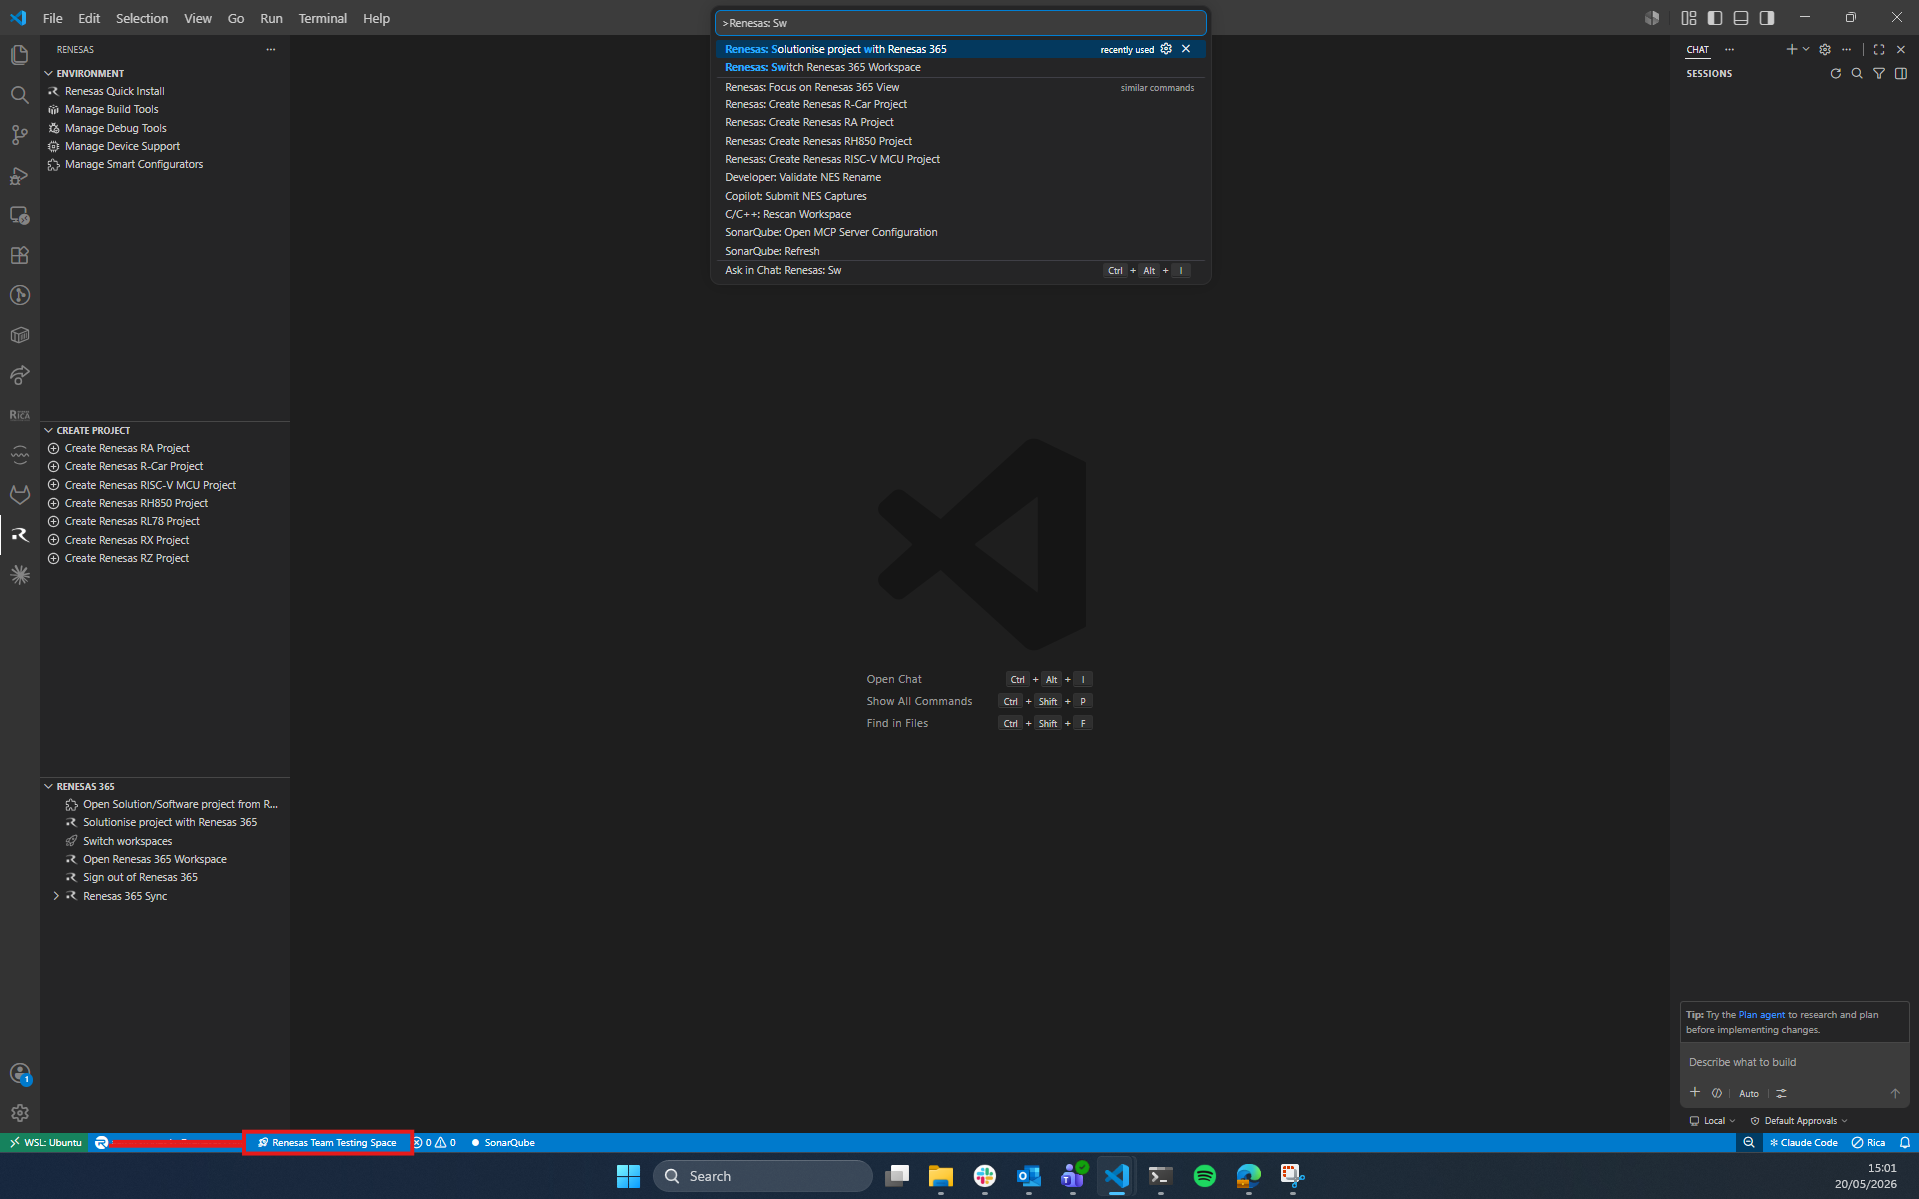
2.6.3. Using the Activity Bar
The currently active workspace name is displayed directly in the VS Code Activity Bar and can be clicked to switch workspaces:
Locate the Renesas icon in the Activity Bar on the left-hand side of VS Code.
Click on the workspace name displayed under the Renesas 365 section.
A list of available Renesas 365 workspaces associated with your account will be displayed.
Select the workspace you wish to switch to. The extension will exchange your access token for a workspace-scoped token and update the status bar accordingly.
2.7. Viewing Solutions and Software Projects
Once signed in and a workspace is selected, you can browse the solutions and software projects contained within your Renesas 365 workspace. This feature is accessible via two methods:
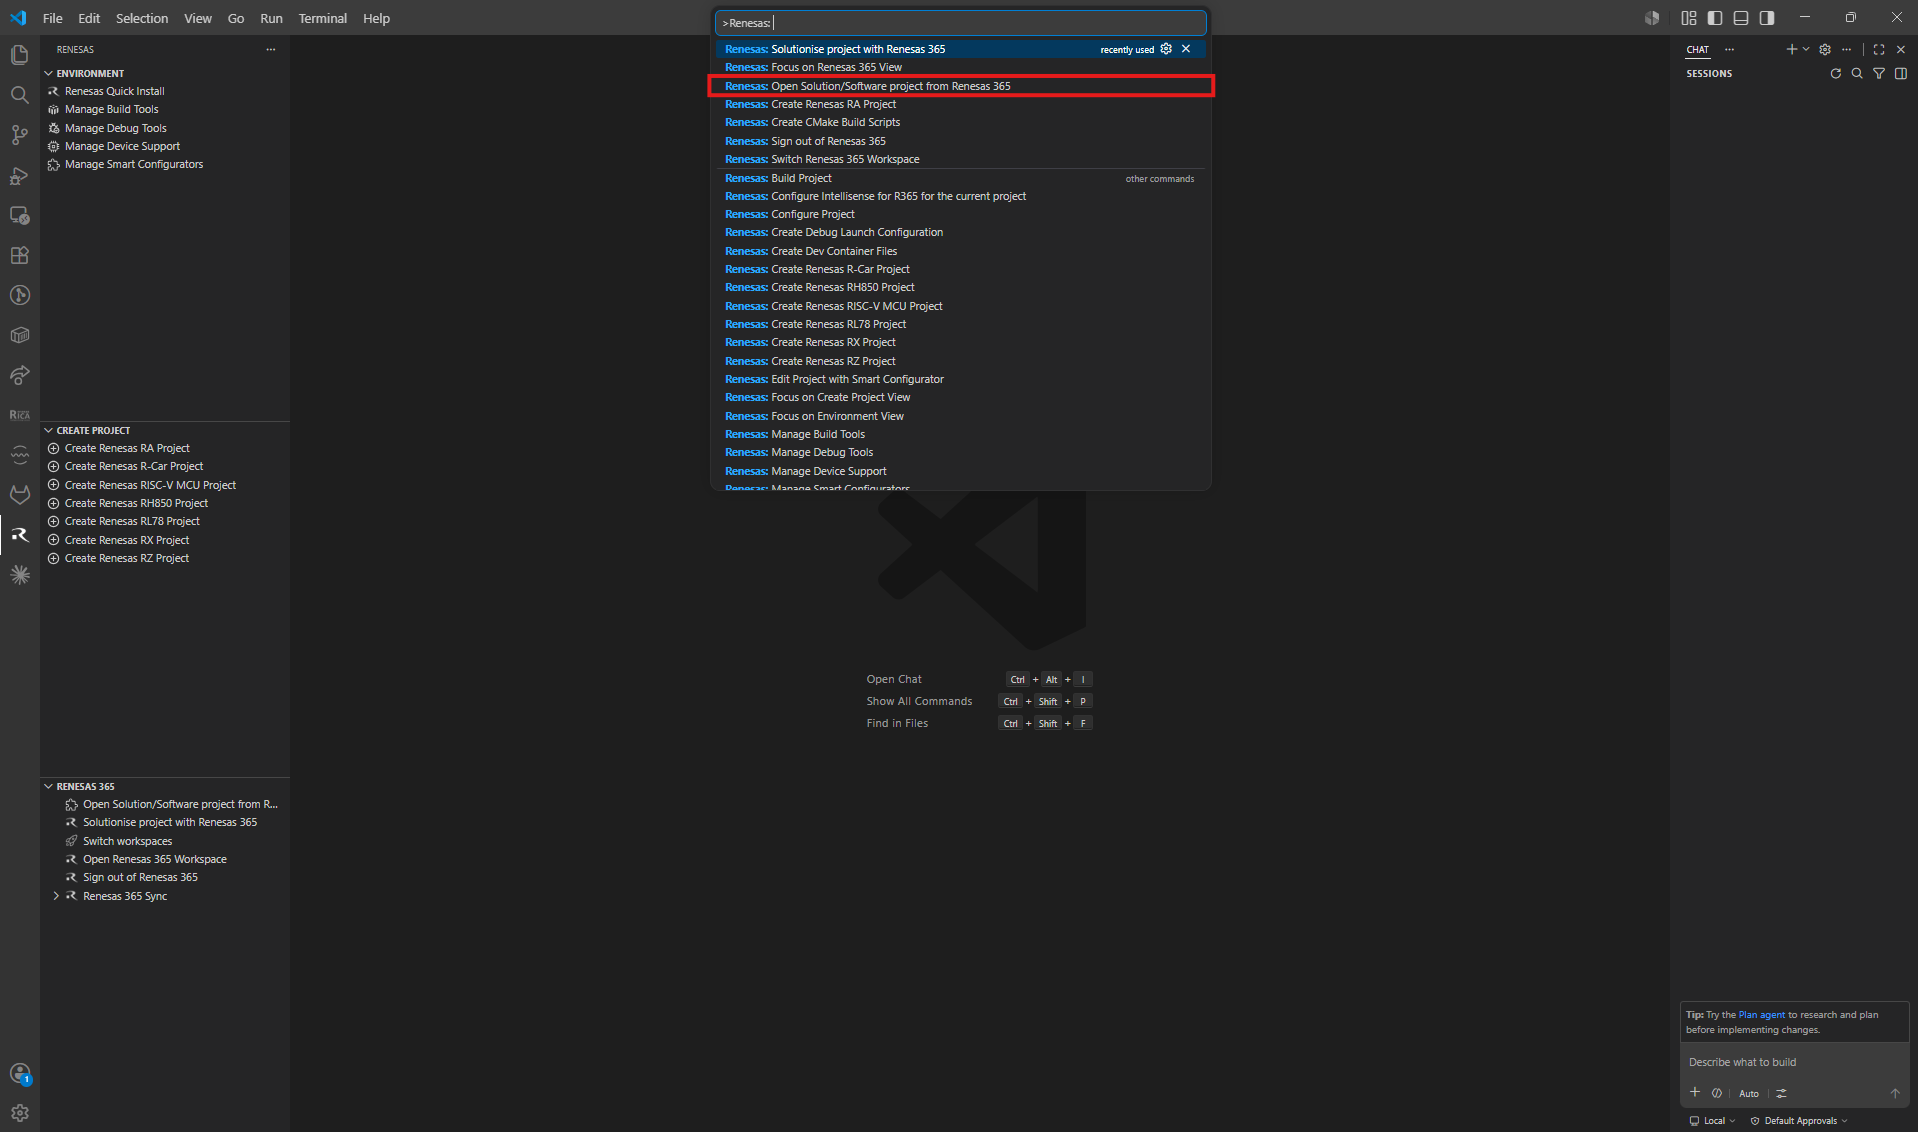
2.7.1. Using the Command Palette
Open the Command Palette by pressing
Ctrl+Shift+P(Windows/Linux) orCmd+Shift+P(macOS).Type and select Renesas: Open Solution/Software project from Renesas 365.
The solutions and their associated software projects within the active workspace will be displayed.
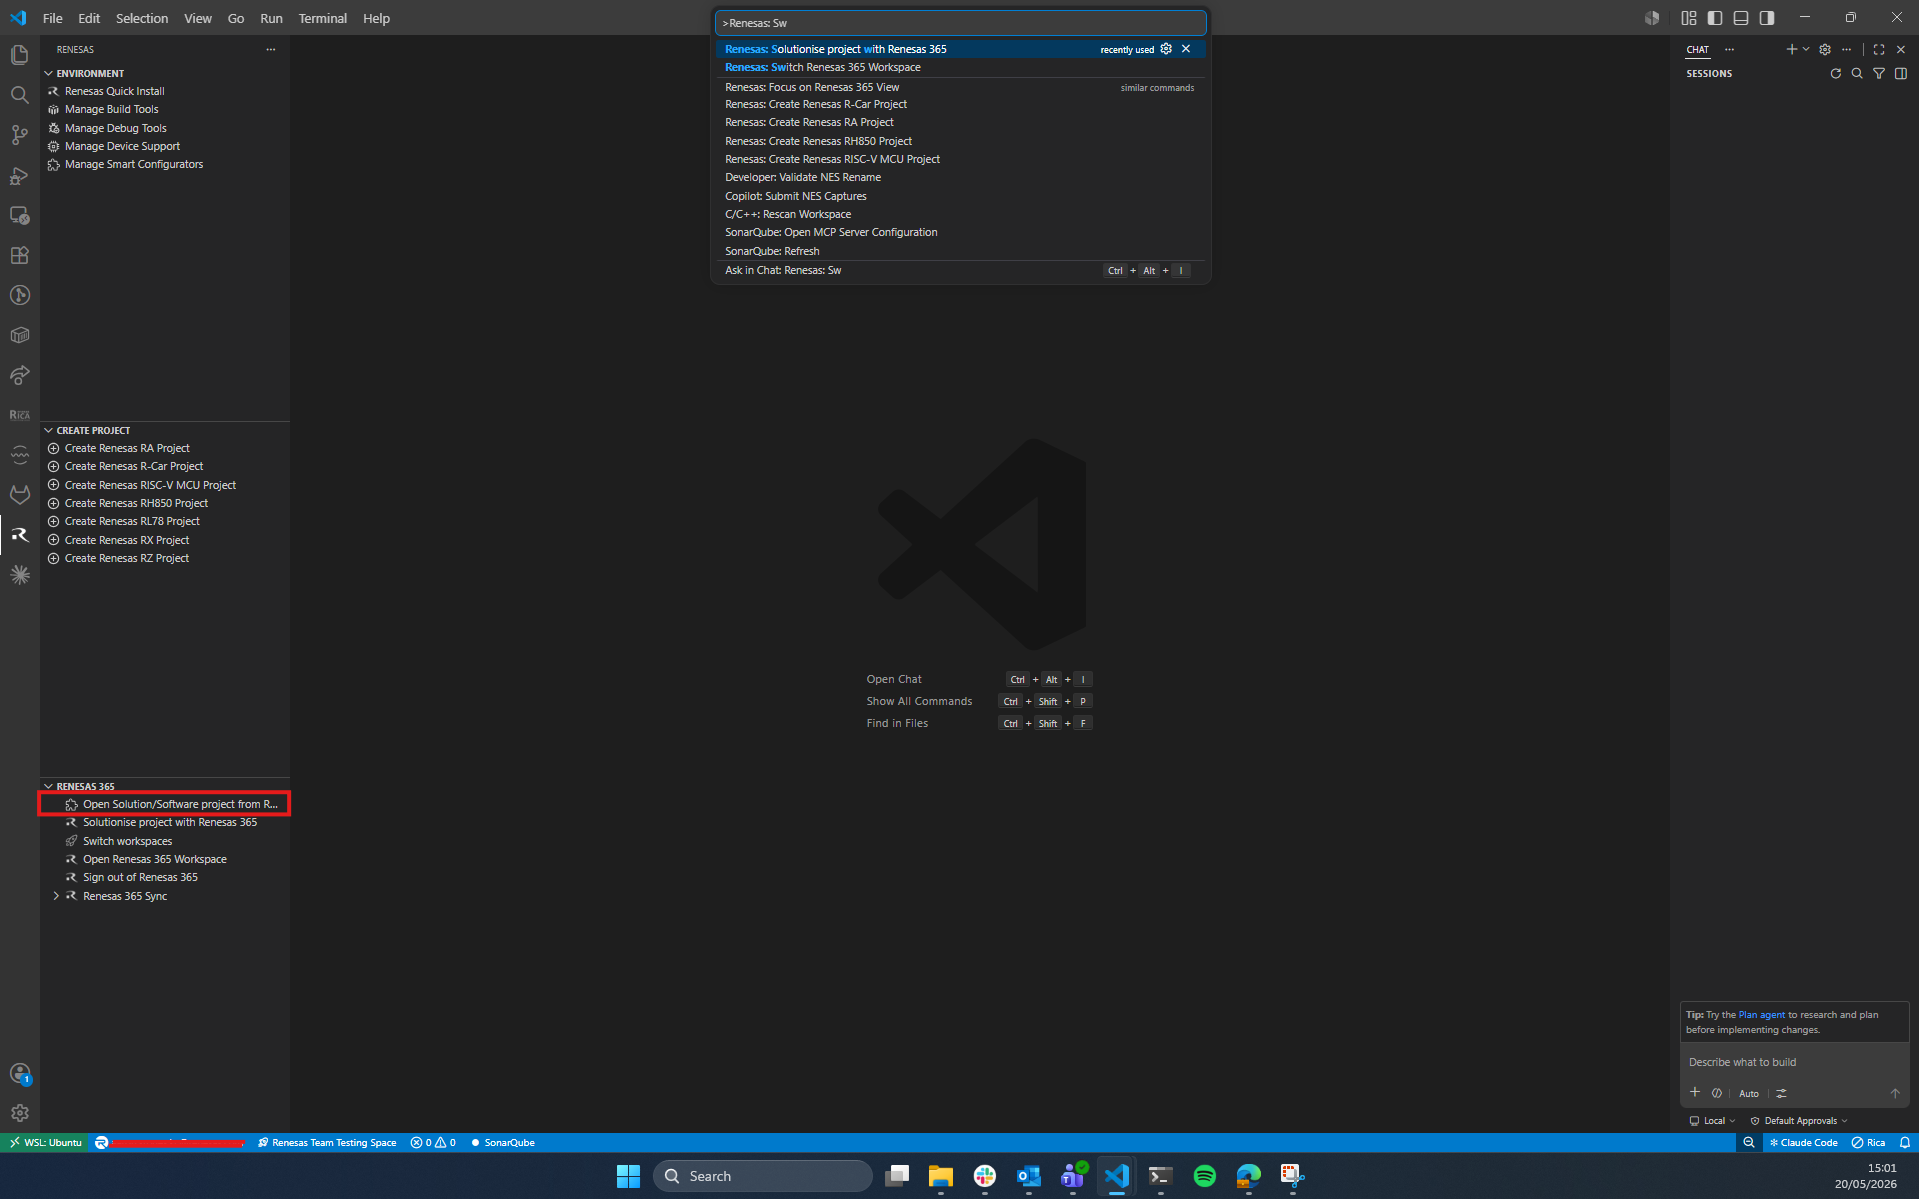
2.7.2. Using the Sidebar
The solutions and software projects are also visible directly within the Renesas sidebar panel:
Open the Renesas tab from the VS Code sidebar.
Locate the Renesas 365 section within the panel.
The list of solutions and software projects for the active workspace will be displayed and can be expanded to browse their contents.
2.7.3. Browsing and Opening Software Projects
Once the solutions view is open, you can filter, select, and open one or more software projects:
Use the filter box at the top of the panel to search for solutions by name.
Click a Solution row to expand it and reveal its associated Software Projects.
Click an individual Software Project row to select or deselect it. Selected items are highlighted.
Alternatively, click a Solution row to select or deselect all of its software projects at once.
The Selected Software Projects panel on the right will update to reflect your current selection.
Once you have made your selection, click Open Projects to clone and open the selected repositories in VS Code.
If a single project is selected, it will be opened directly.
If multiple projects are selected, all repositories will be cloned and opened together.
To dismiss the solutions view without opening any projects, click Close Solution View.
Note
The Open Projects button is disabled until at least one software project is selected.
If the repository requires credentials, you will be prompted to enter a username and password before cloning proceeds.
2.8. Open a Renesas 365 Workspace in the Browser
You can launch your currently active Renesas 365 workspace directly in your web browser for full portal access. This feature is accessible via two methods:
2.8.1. Using the Sidebar
An open in browser button is available directly within the Renesas sidebar panel:
Open the Renesas tab from the VS Code sidebar.
Locate the Renesas 365 section within the panel.
Click the Open Workspace in Browser button displayed in the section.
Your default web browser will open and navigate to the active Renesas 365 workspace in the portal.

2.9. Solutionise an RA Smart Configurator Project
You can convert an existing RA Smart Configurator project into a Renesas 365 solution, making it available as a software project within your workspace. This also covers migrating an existing local project into Renesas 365 by registering it with your active workspace. This feature is accessible via three methods:
Note
Only RA (Renesas Advanced) projects are supported for solutionising. Attempting to solutionise a non-RA project will result in an error.
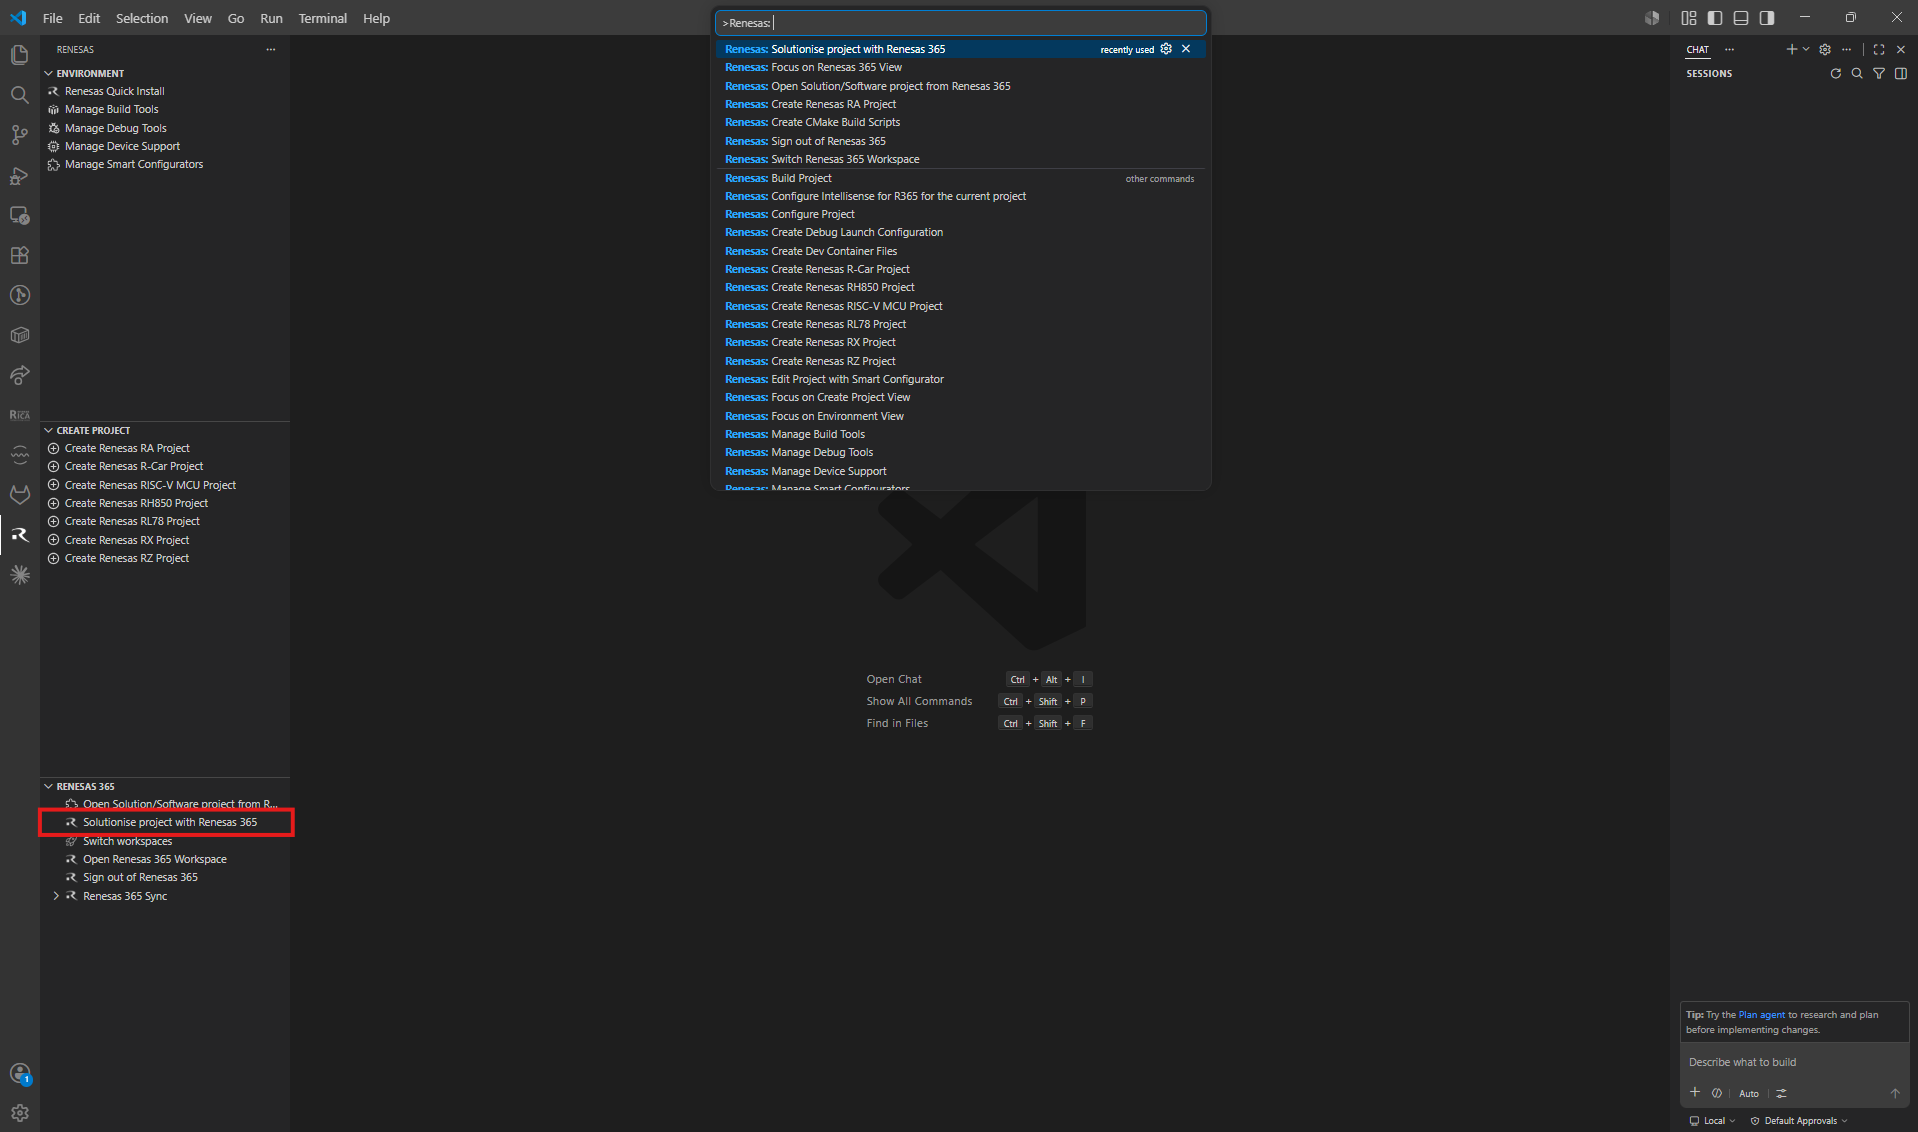
2.9.1. Using the Command Palette
Open the Command Palette by pressing
Ctrl+Shift+P(Windows/Linux) orCmd+Shift+P(macOS).Type and select Renesas: Solutionise project with Renesas 365.
Follow the prompts to select the RA Smart Configurator project to be converted.
The project will be integrated into your active Renesas 365 workspace as a software project.

2.9.2. Using the Sidebar
The solutionise action is also accessible from the Renesas sidebar panel:
Open the Renesas tab from the VS Code sidebar.
Locate the Renesas 365 section within the panel.
Click the Solutionise RA Smart Configurator Project button displayed in the section.
Follow the prompts to select the RA Smart Configurator project to be converted.
The project will be integrated into your active Renesas 365 workspace as a software project.
2.9.4. Solutionising Workflow
Regardless of the access method used, the solutionising process follows these steps:
The extension checks whether the selected project has already been solutionised. If it has, the process will not proceed.
The extension detects your Git repository type and remote URL.
You will be prompted to either:
Create a new Renesas 365 solution, or
Link to an existing solution within your active workspace.
You will be asked to confirm the project name and optionally provide a project description.
You will be asked to select a folder or workspace within Renesas 365 to register the project under.
A final confirmation dialog will be displayed summarising the details. Confirm to proceed.
The extension will generate an SDM file for the project and upload it to Renesas 365.
If no Git repository exists for the project, one will be initialised automatically.
The following files will be created in your local project directory:
An SDM project file (
.sdm_json).A
.gitignorefile pre-populated with/buildand/Debugentries (if one does not already exist).A software components configuration file.
Temporary files generated during the process are cleaned up automatically on completion.
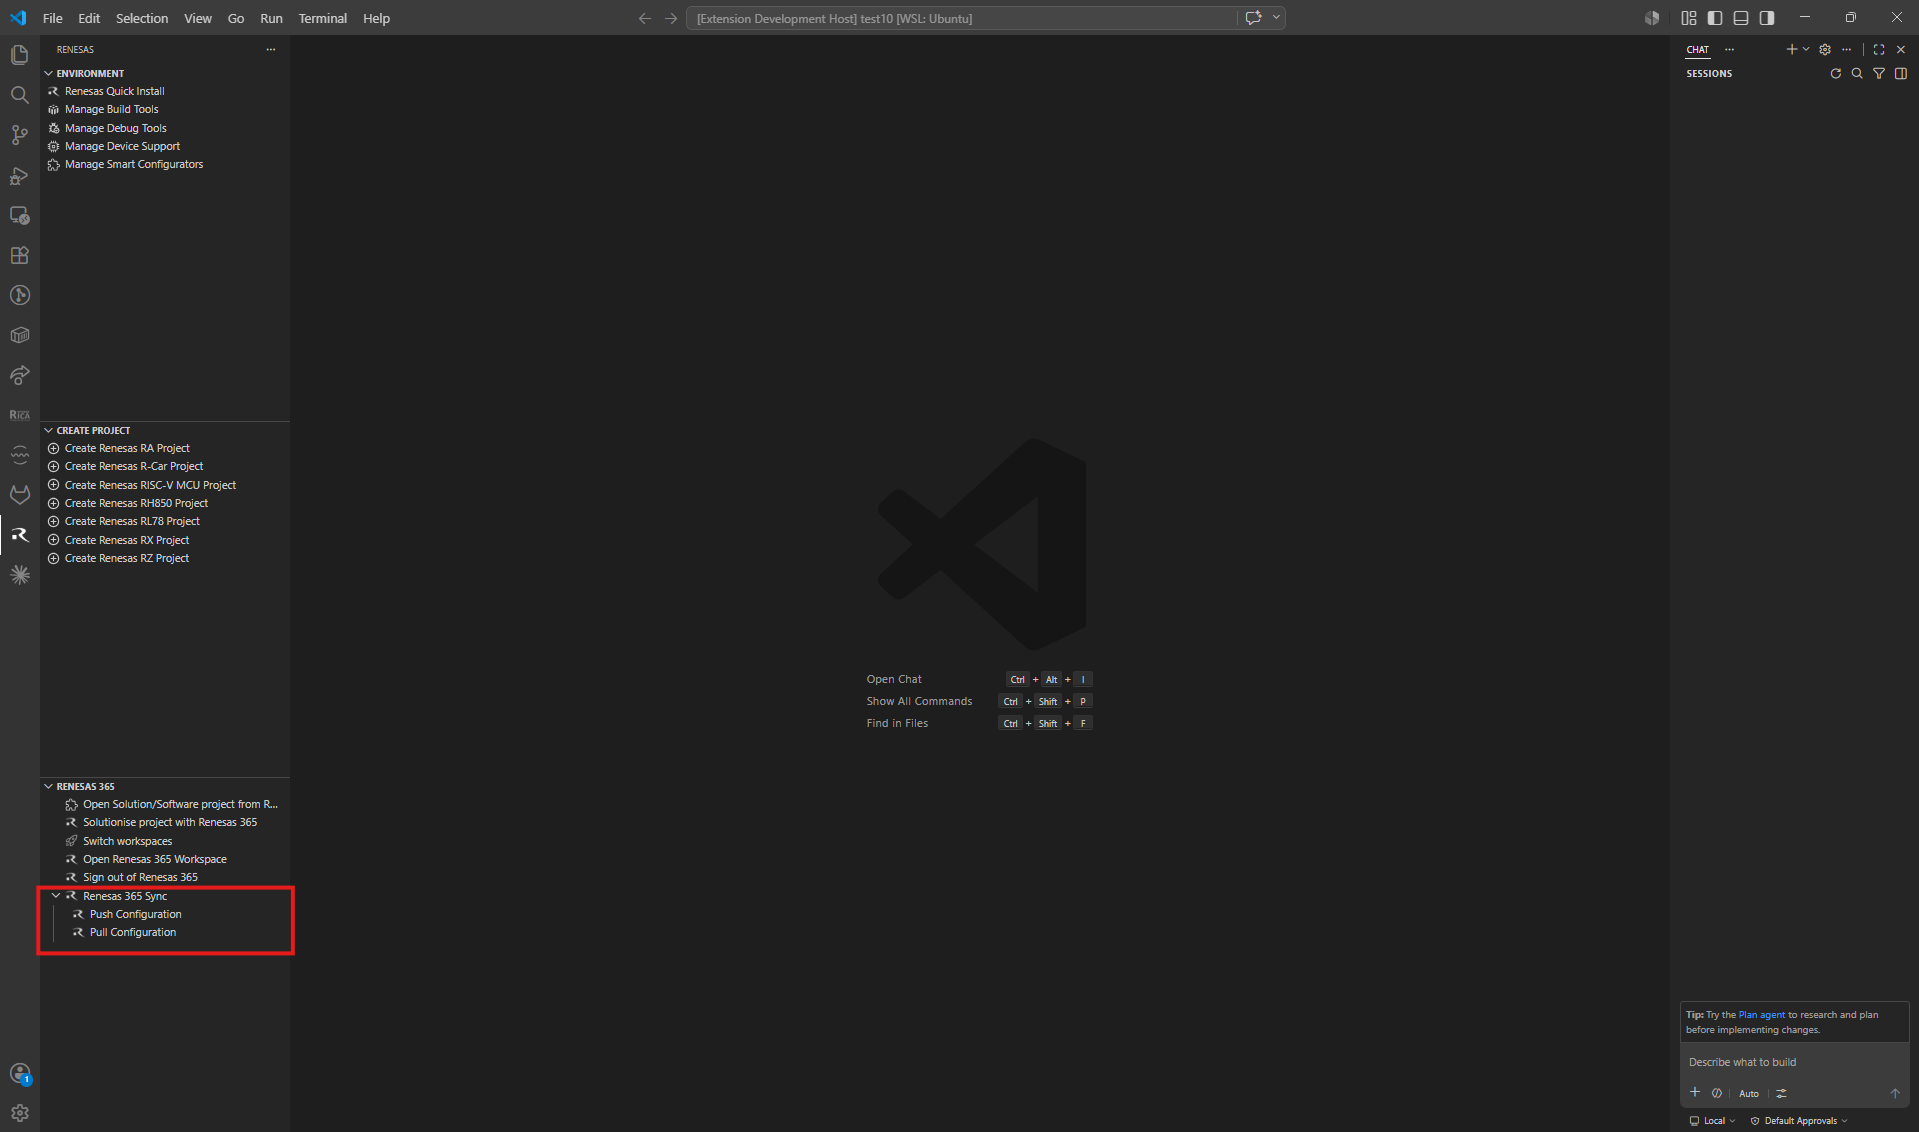
2.10. Push & Pull Changes
You can synchronise changes between a Renesas 365 software project and your local .sdm_json file. Pushing will upload your local changes to the Renesas 365 software project, while pulling will update your local .sdm_json with the latest changes from Renesas 365. This feature is accessible via two methods:
Note
Before using Push or Pull, ensure you are signed in to Renesas 365 and have an active workspace selected. The project must have already been solutionised and registered with Renesas 365. If the project has not been registered, the push and pull options will not appear in the context menu.
2.10.1. Using the Explorer Context Menu
Push and pull actions can be triggered directly from the VS Code Explorer:
In the VS Code Explorer, locate your project’s
configuration.xmlfile.Right-click the file to open the context menu.
Select Push SDM to Renesas 365 to upload your local changes to the Renesas 365 software project, or select Pull SDM from Renesas 365 to update your local
.sdm_jsonwith the latest changes from Renesas 365.A progress notification will appear in the bottom-right corner of VS Code while the operation completes.
Once the operation finishes, a confirmation notification will indicate whether it was successful.
2.10.2. Using the Sidebar
Push and pull actions are also accessible from the Renesas sidebar panel:
Open the Renesas tab from the VS Code sidebar.
Locate the Renesas 365 section within the panel.
Click the Push Changes button to upload local changes to the Renesas 365 software project.
Click the Pull Changes button to update your local
.sdm_jsonwith the latest changes from Renesas 365.
2.10.3. How to Push SDM Changes to Renesas 365
Pushing uploads the current state of your local .sdm_json file to the corresponding software project stored in Renesas 365. Use this operation whenever you have made local changes — such as modifying software component configurations or updating project metadata — and want those changes to be reflected in the cloud.
Steps:
In the VS Code Explorer, locate the
configuration.xmlfile for the project you wish to push.Right-click the
configuration.xmlfile to open the context menu.Select Push SDM to Renesas 365 from the context menu.
A progress notification reading “Pushing sdm project to Renesas 365…” will appear in the bottom-right corner of VS Code. Do not close VS Code or modify the file while this operation is in progress.
Once the upload completes successfully, the notification will update to confirm the push was successful. The Renesas 365 cloud record for the software project will now reflect your local changes.
Note
If the push fails, check that:
You are still signed in to Renesas 365 (your session has not expired).
The active workspace matches the workspace the project was originally registered under.
Your
.sdm_jsonfile is valid and has not been manually corrupted.
If the issue persists, try signing out and signing back in, then retry the push.
2.10.4. How to Pull SDM Changes from Renesas 365
Pulling downloads the latest version of the SDM data from Renesas 365 and presents you with a merge view, allowing you to reconcile the differences between the cloud version and your local .sdm_json file. Use this operation when you want to incorporate changes that have been made to the software project in the Renesas 365 portal, or when collaborating with other team members who have pushed updates.
Steps:
In the VS Code Explorer, locate the
configuration.xmlfile for the project you wish to update.Right-click the
configuration.xmlfile to open the context menu.Select Pull SDM from Renesas 365 from the context menu.
A progress notification reading “Pulling sdm project from Renesas 365…” will appear in the bottom-right corner of VS Code while the cloud version is being retrieved.
Once the download completes, you will be presented with a merge view showing the differences between your local
.sdm_jsonfile and the version stored in Renesas 365.Review the differences and resolve any conflicts by selecting which changes to keep. You may accept individual changes from either side or manually edit the result to combine both sets of changes as needed.
Once you are satisfied with the merged result, save the file. Your local
.sdm_jsonwill be updated to reflect the merged content.
Note
If the pull fails, check that:
You are still signed in to Renesas 365 (your session has not expired).
The active workspace matches the workspace the project was originally registered under.
The software project still exists in the Renesas 365 portal and has not been deleted or moved.
If the issue persists, try signing out and signing back in, then retry the pull.